

Onboard in minutes
Set up MonetizeNow in five stages (company, integrations, catalog, quote rules, testing) and go live with support at every step.
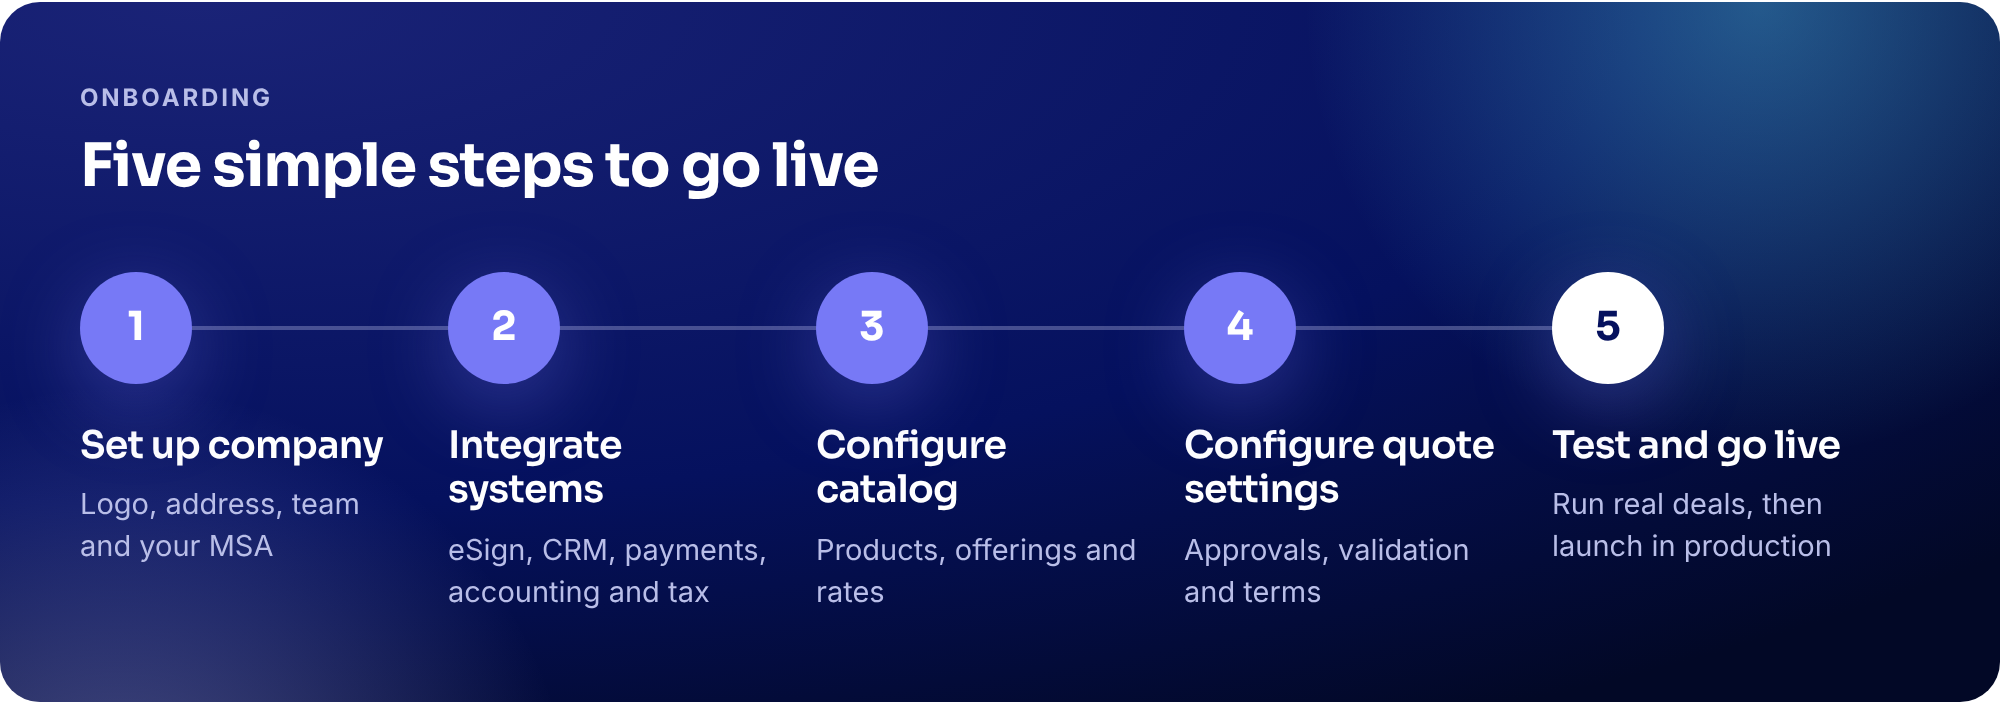
This page gets you from a new tenant to your first live Quote. It has four parts, so you can jump straight to what you need:
| If you want to… | Go to |
|---|---|
| Learn the setup by doing it once, start to finish | Tutorial: your first hour in MonetizeNow |
| Finish one specific setup task | How-to guides |
| Look up where a setting lives, or tick off the checklist | Reference |
| Understand why onboarding is ordered this way | Why this order |
Start in your sandbox. Build and test everything in your sandbox tenant first, then repeat the same setup in production. Each tenant has its own settings, catalog and connections. Nothing copies over automatically.
Tip: Most of this checklist is also built into the app. Go to Settings → Tenant → Onboarding to see 1. Getting Started, 2. Configure Catalog and 3. Load Historical Data, with links to each setting.
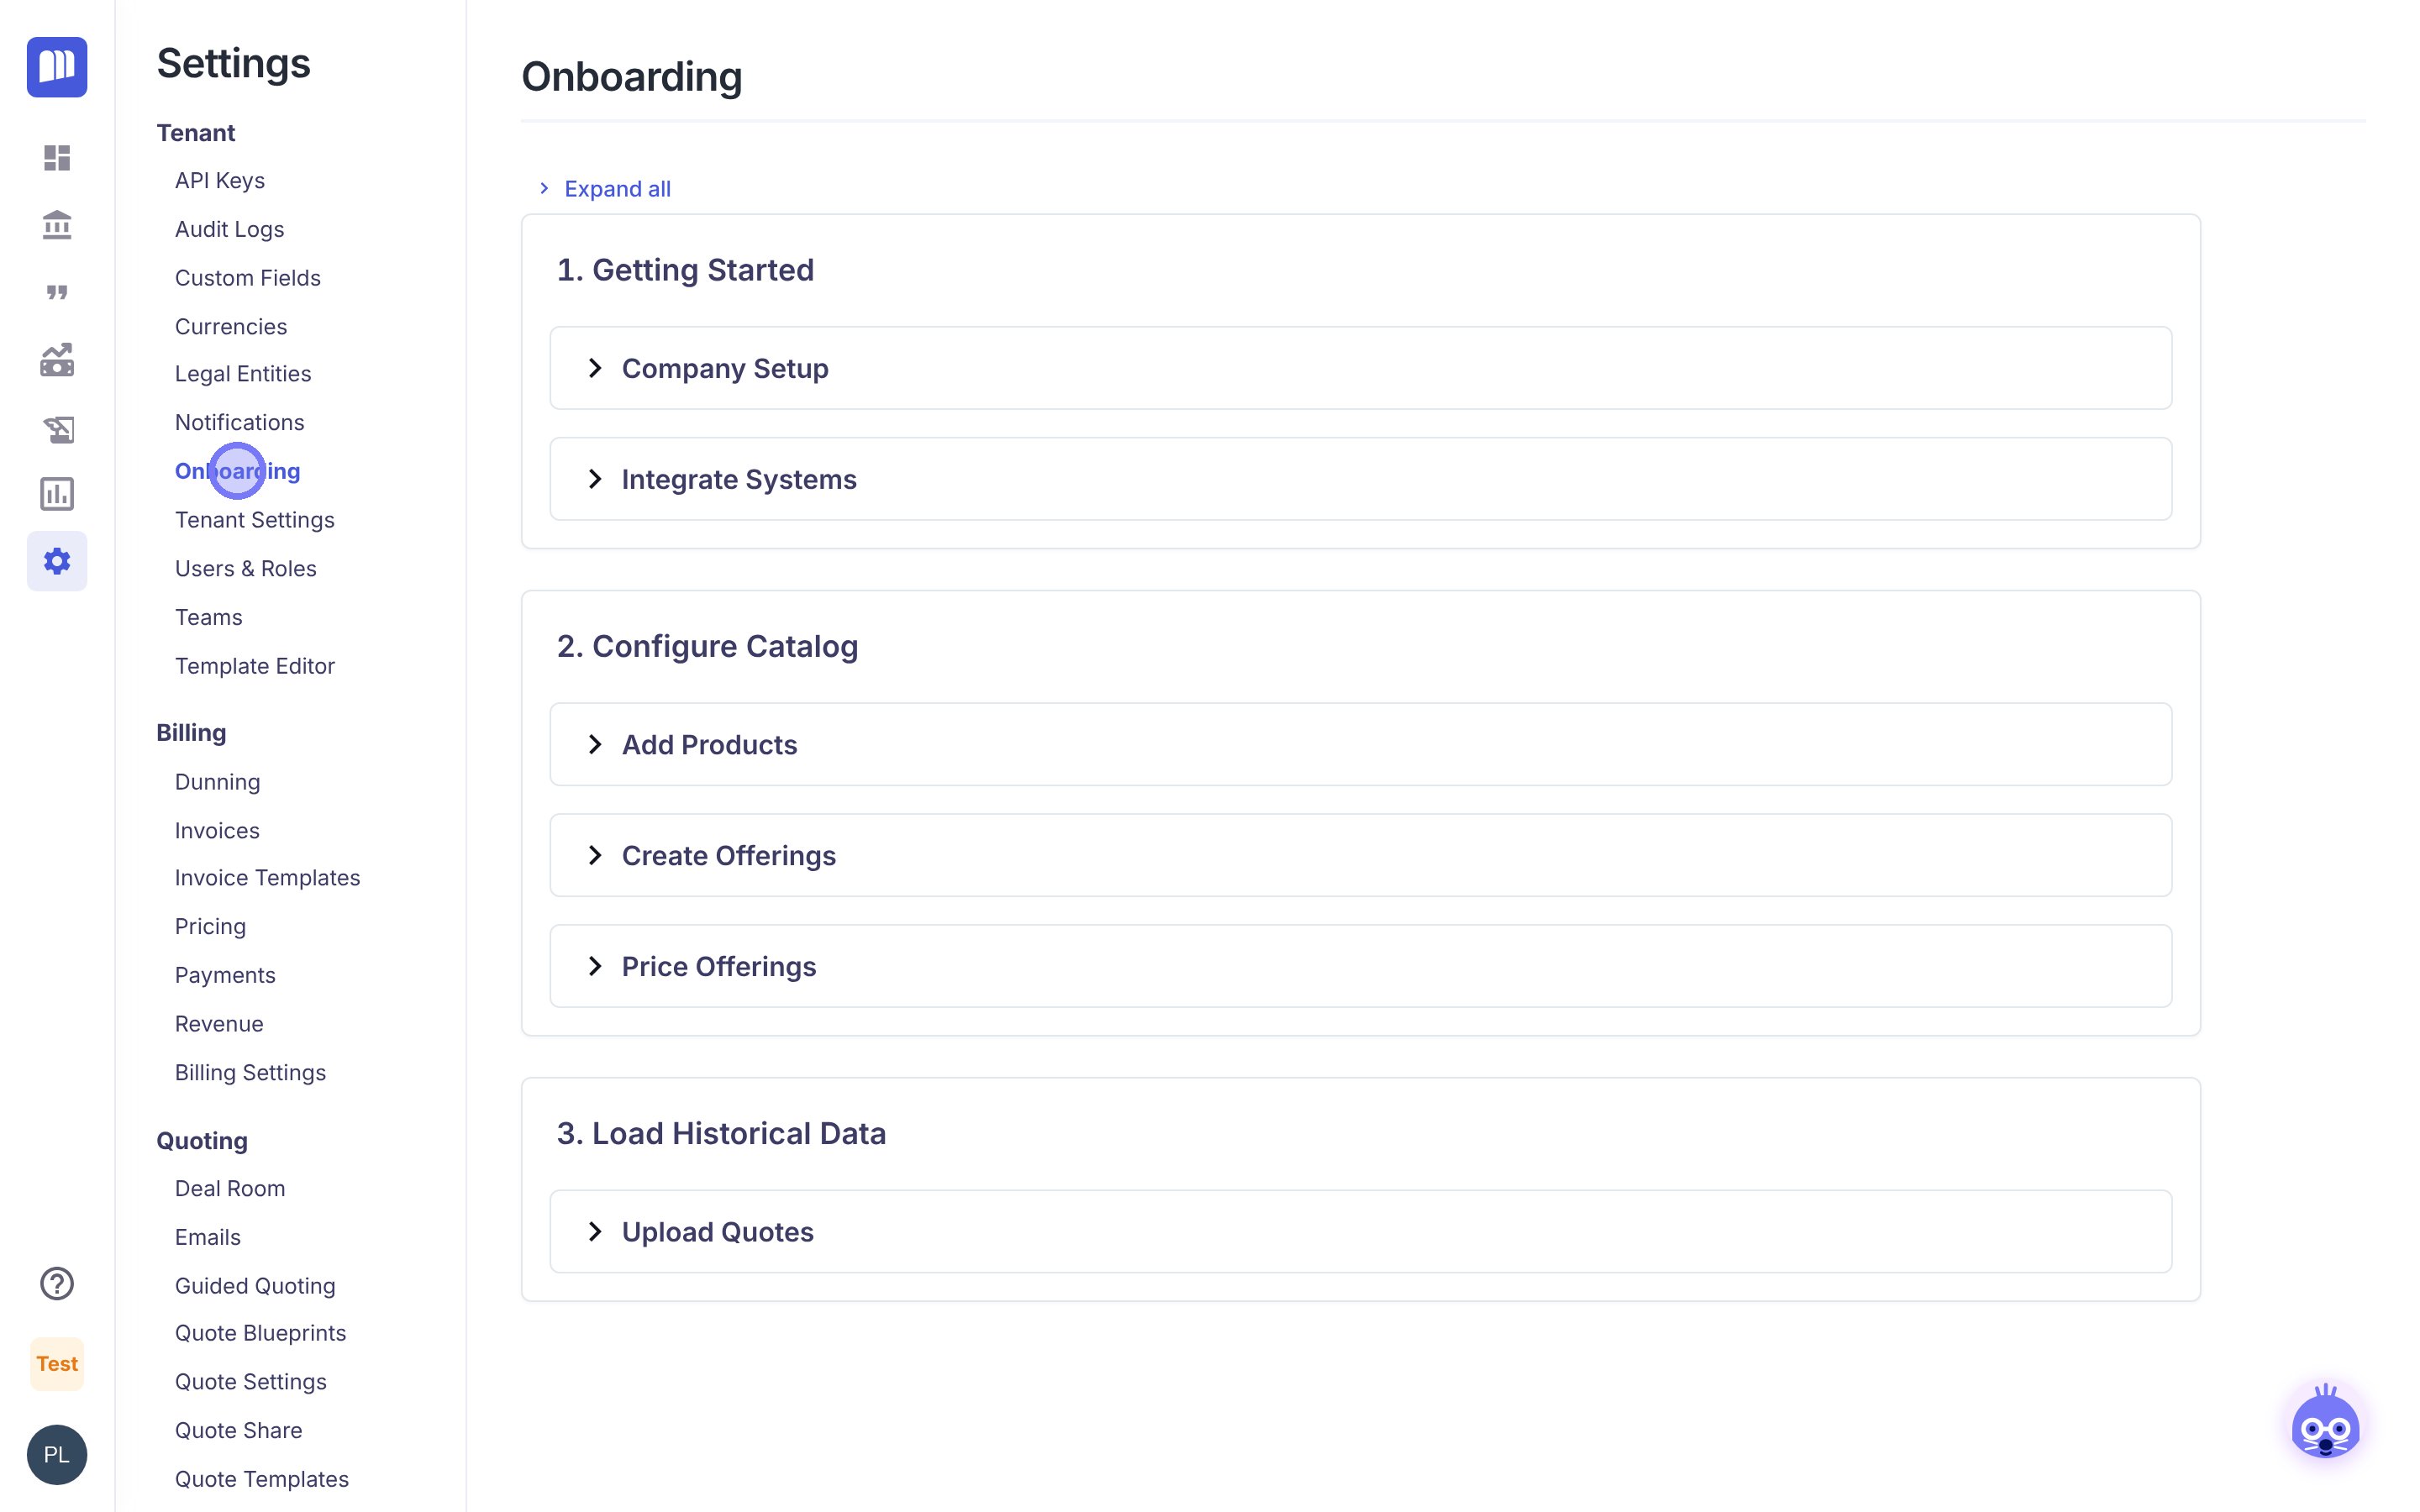
Settings → Tenant → Onboarding
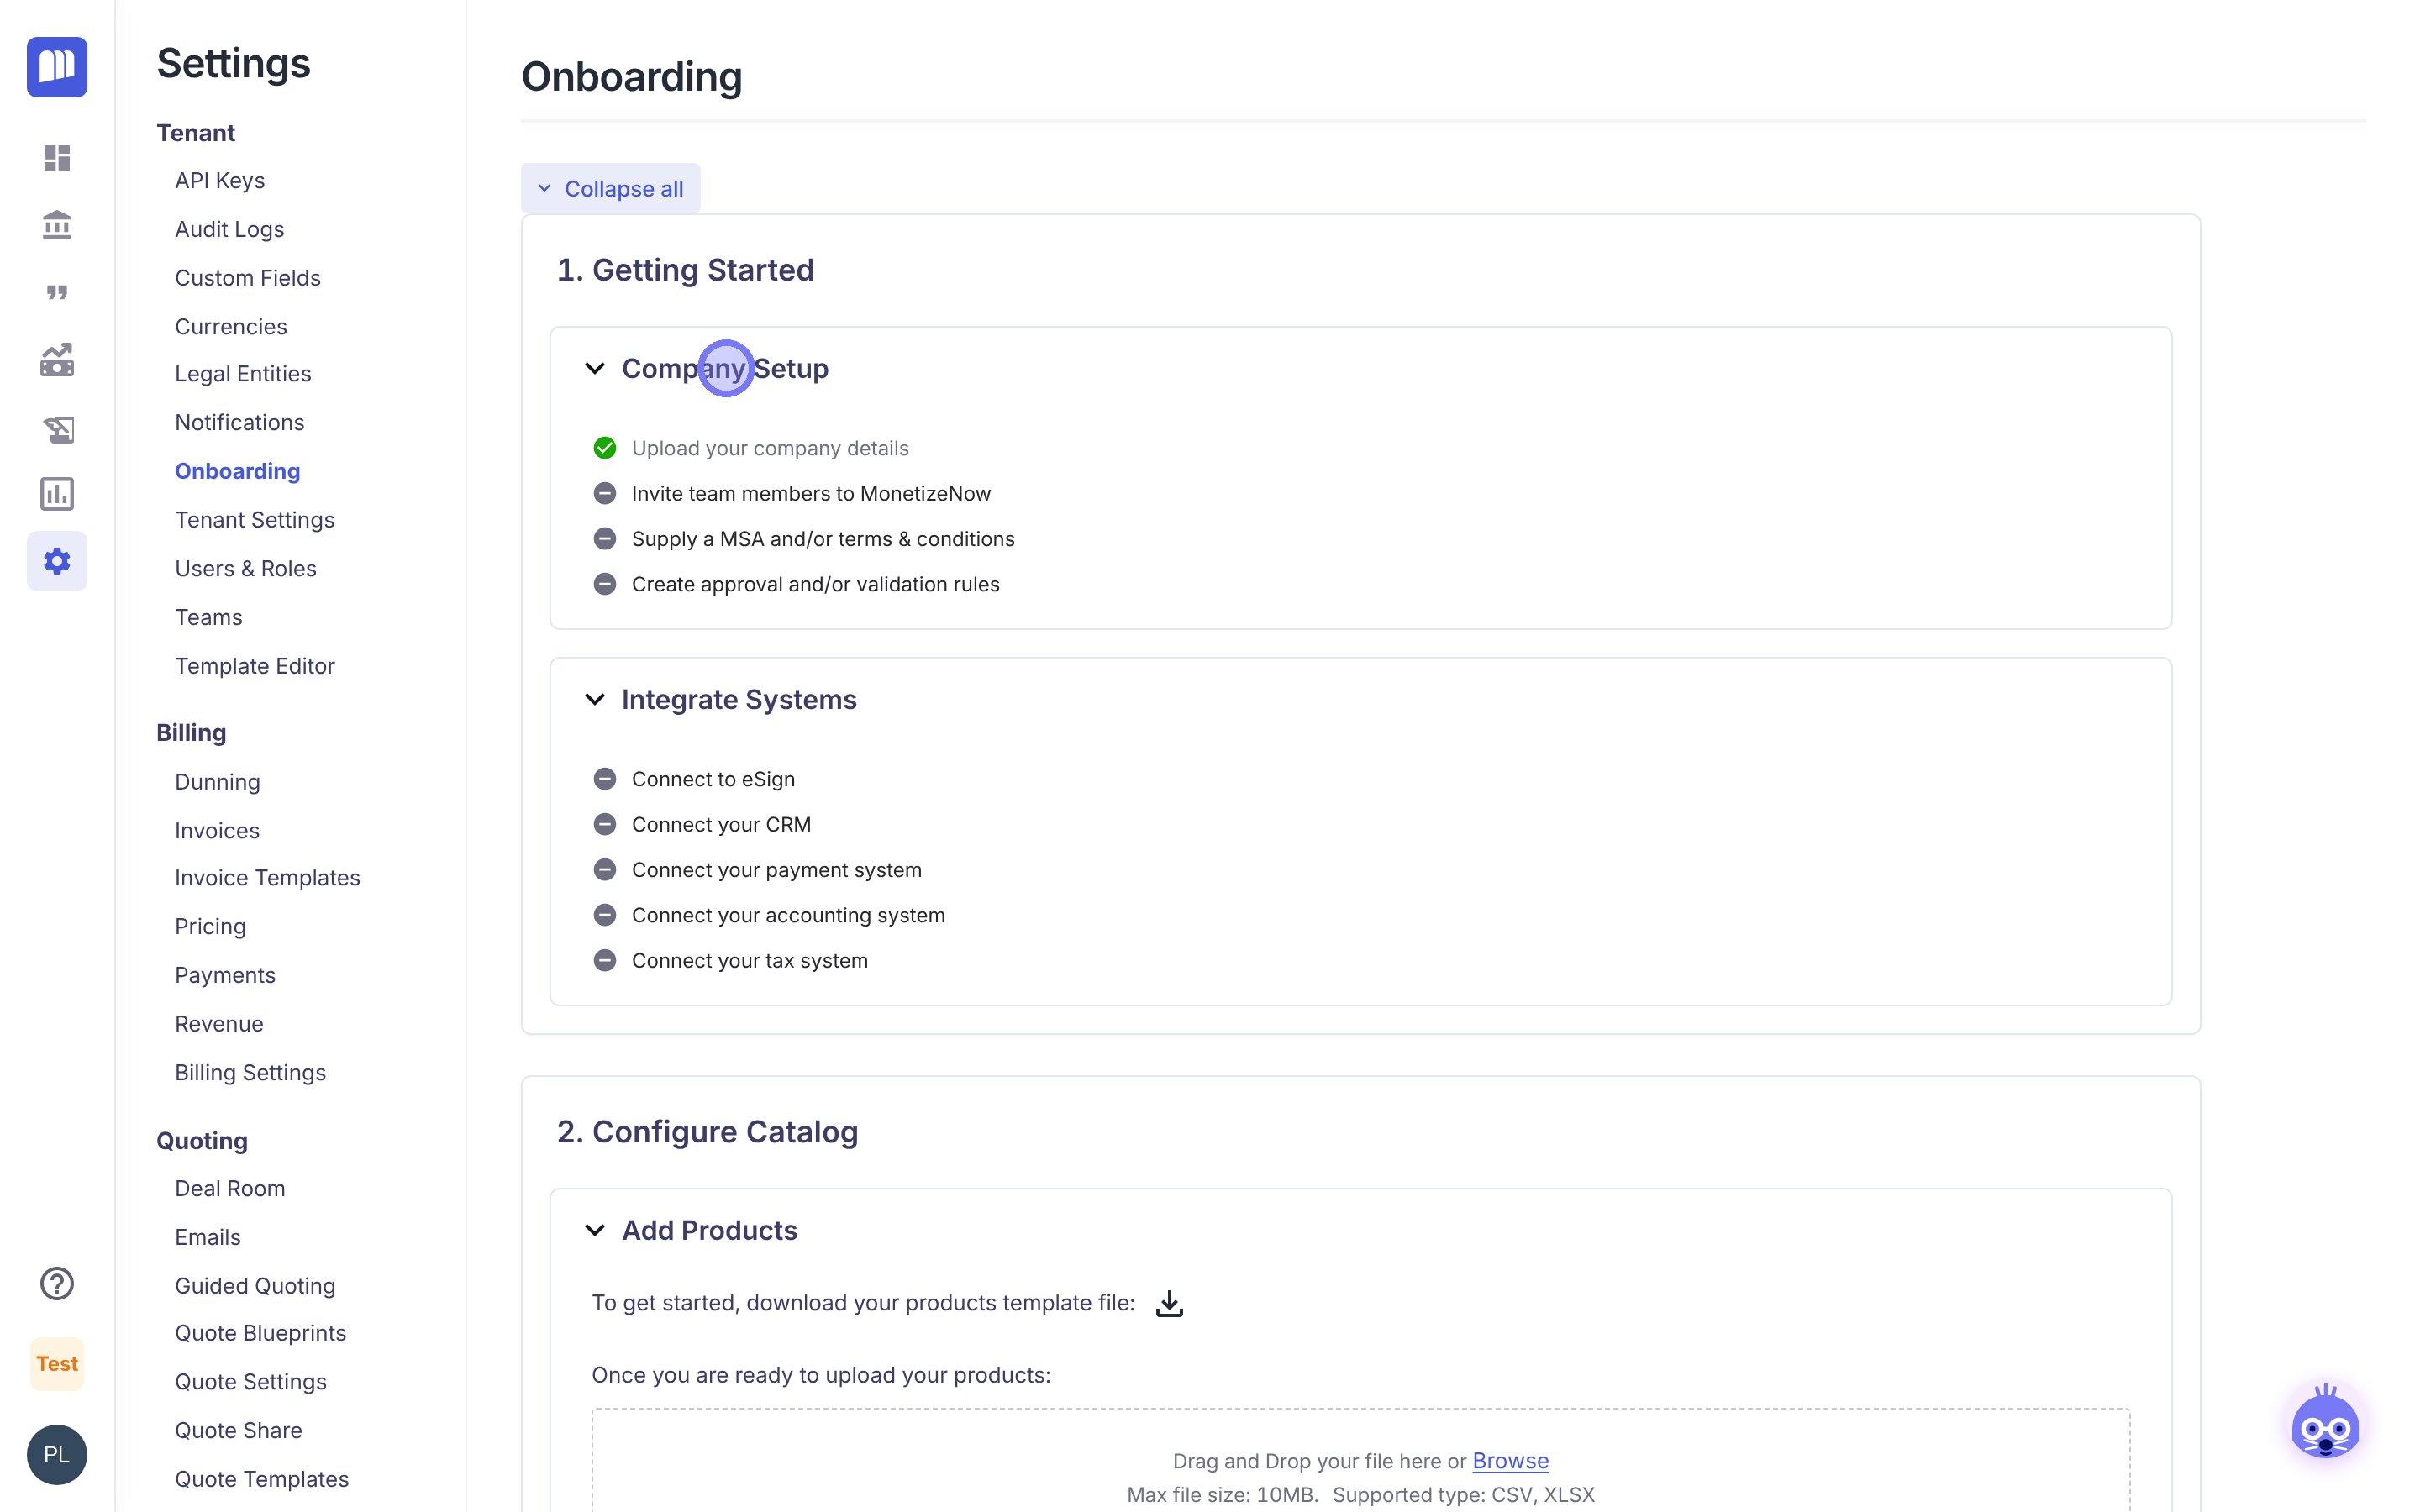
Click Expand all to see each checklist item. Completed items show a green check.
Tutorial: your first hour in MonetizeNow
Learning-oriented. Follow along once, in your sandbox, to see how the pieces fit together.
You'll need: the Tenant Admin role, your company logo (PNG, 10 MB or less), your company address, and a link to your Master Service Agreement (MSA).
You'll end with: a company profile on your Quotes and Invoices, a teammate invited, your MSA on every Quote, an approval rule, and a test Quote submitted for approval.
Part 1: set up your company (about 30 minutes)
Follow the interactive walkthrough below. Every screen in it is a real capture of the MonetizeNow app.
In short, you will:
- Click Settings (the gear icon) in the left-hand menu.
- Under Tenant, click Legal Entities, open the Default row, upload your logo and fill in Company Name and address. Click Save.
- Click Users & Roles → Invite Users, enter emails, pick a Role, and click Send.
- Under Quoting, click Quote Settings → Quote Documents, then add your MSA link and any standard documents.
- Under Rules, click Approval Rules → New, and send Quotes with Discount Percent greater than 50 to an approver.
Part 2: create and submit a test Quote (about 3 minutes)
You need at least one product, offering, account and contact first. If your catalog is empty, do Configure your catalog first.
In short: Sales → Quotes → New Quote → pick the account → add contacts, a contract term and an offering → add a discount that triggers your approval rule → Submit.
What you've learned: company details flow onto every Quote, Quote Documents attach themselves, and your rules decide what needs approval. Next, connect your other systems.
How-to guides
Goal-oriented. Each guide is a short set of steps for one task. They assume you know the basics from the tutorial.
Set up your company
Where: Settings → Tenant and Settings → Quoting. Role: Tenant Admin.
- Add company details. Go to Settings → Tenant → Legal Entities, open Default, upload a PNG logo, and fill in Company Name, contact details and address. Choose an Address Format and click Save. Selling under more than one company? Click New to add another legal entity.
- Invite your team. Go to Settings → Tenant → Users & Roles → Invite Users. Everyone in one invite gets the same roles, so send separate invites for different roles. See Role Recommendations.
- Add your MSA and terms. Go to Settings → Quoting → Quote Settings → Quote Documents. Link your Master Service Agreement (MSA), upload standard PDFs, and turn on Add to New Quotes for documents that go on every Quote.
▶ Walkthrough: Set Up Your Company in MonetizeNow
Work with the MonetizeNow team on: custom quote and billing operations, contract renewal settings, automations, and dunning.
Connect your systems
Where: Settings → Integrations. Connect each system in your sandbox first, using sandbox or test accounts on the other side too.
- eSign: go to Settings → Integrations → eSign and connect DocuSign or Adobe Acrobat Sign.
- CRM: go to Settings → Integrations → CRM and connect Salesforce, HubSpot or Attio.
- Payments: go to Settings → Integrations → Payment Gateway and connect Stripe. The gateway must show Active. To charge customers automatically, follow Set up automatic payment collection.
- Accounting: go to Settings → Integrations → Accounting and connect QuickBooks, NetSuite or Xero (Rillet if it's enabled for your account).
- Tax: go to Settings → Integrations → Tax and connect Anrok or Avalara (Taxwire or Vertex if they're enabled for your account).
- Check the sync. If Integration Logs shows under Settings → Integrations, use it to confirm records are moving between systems.
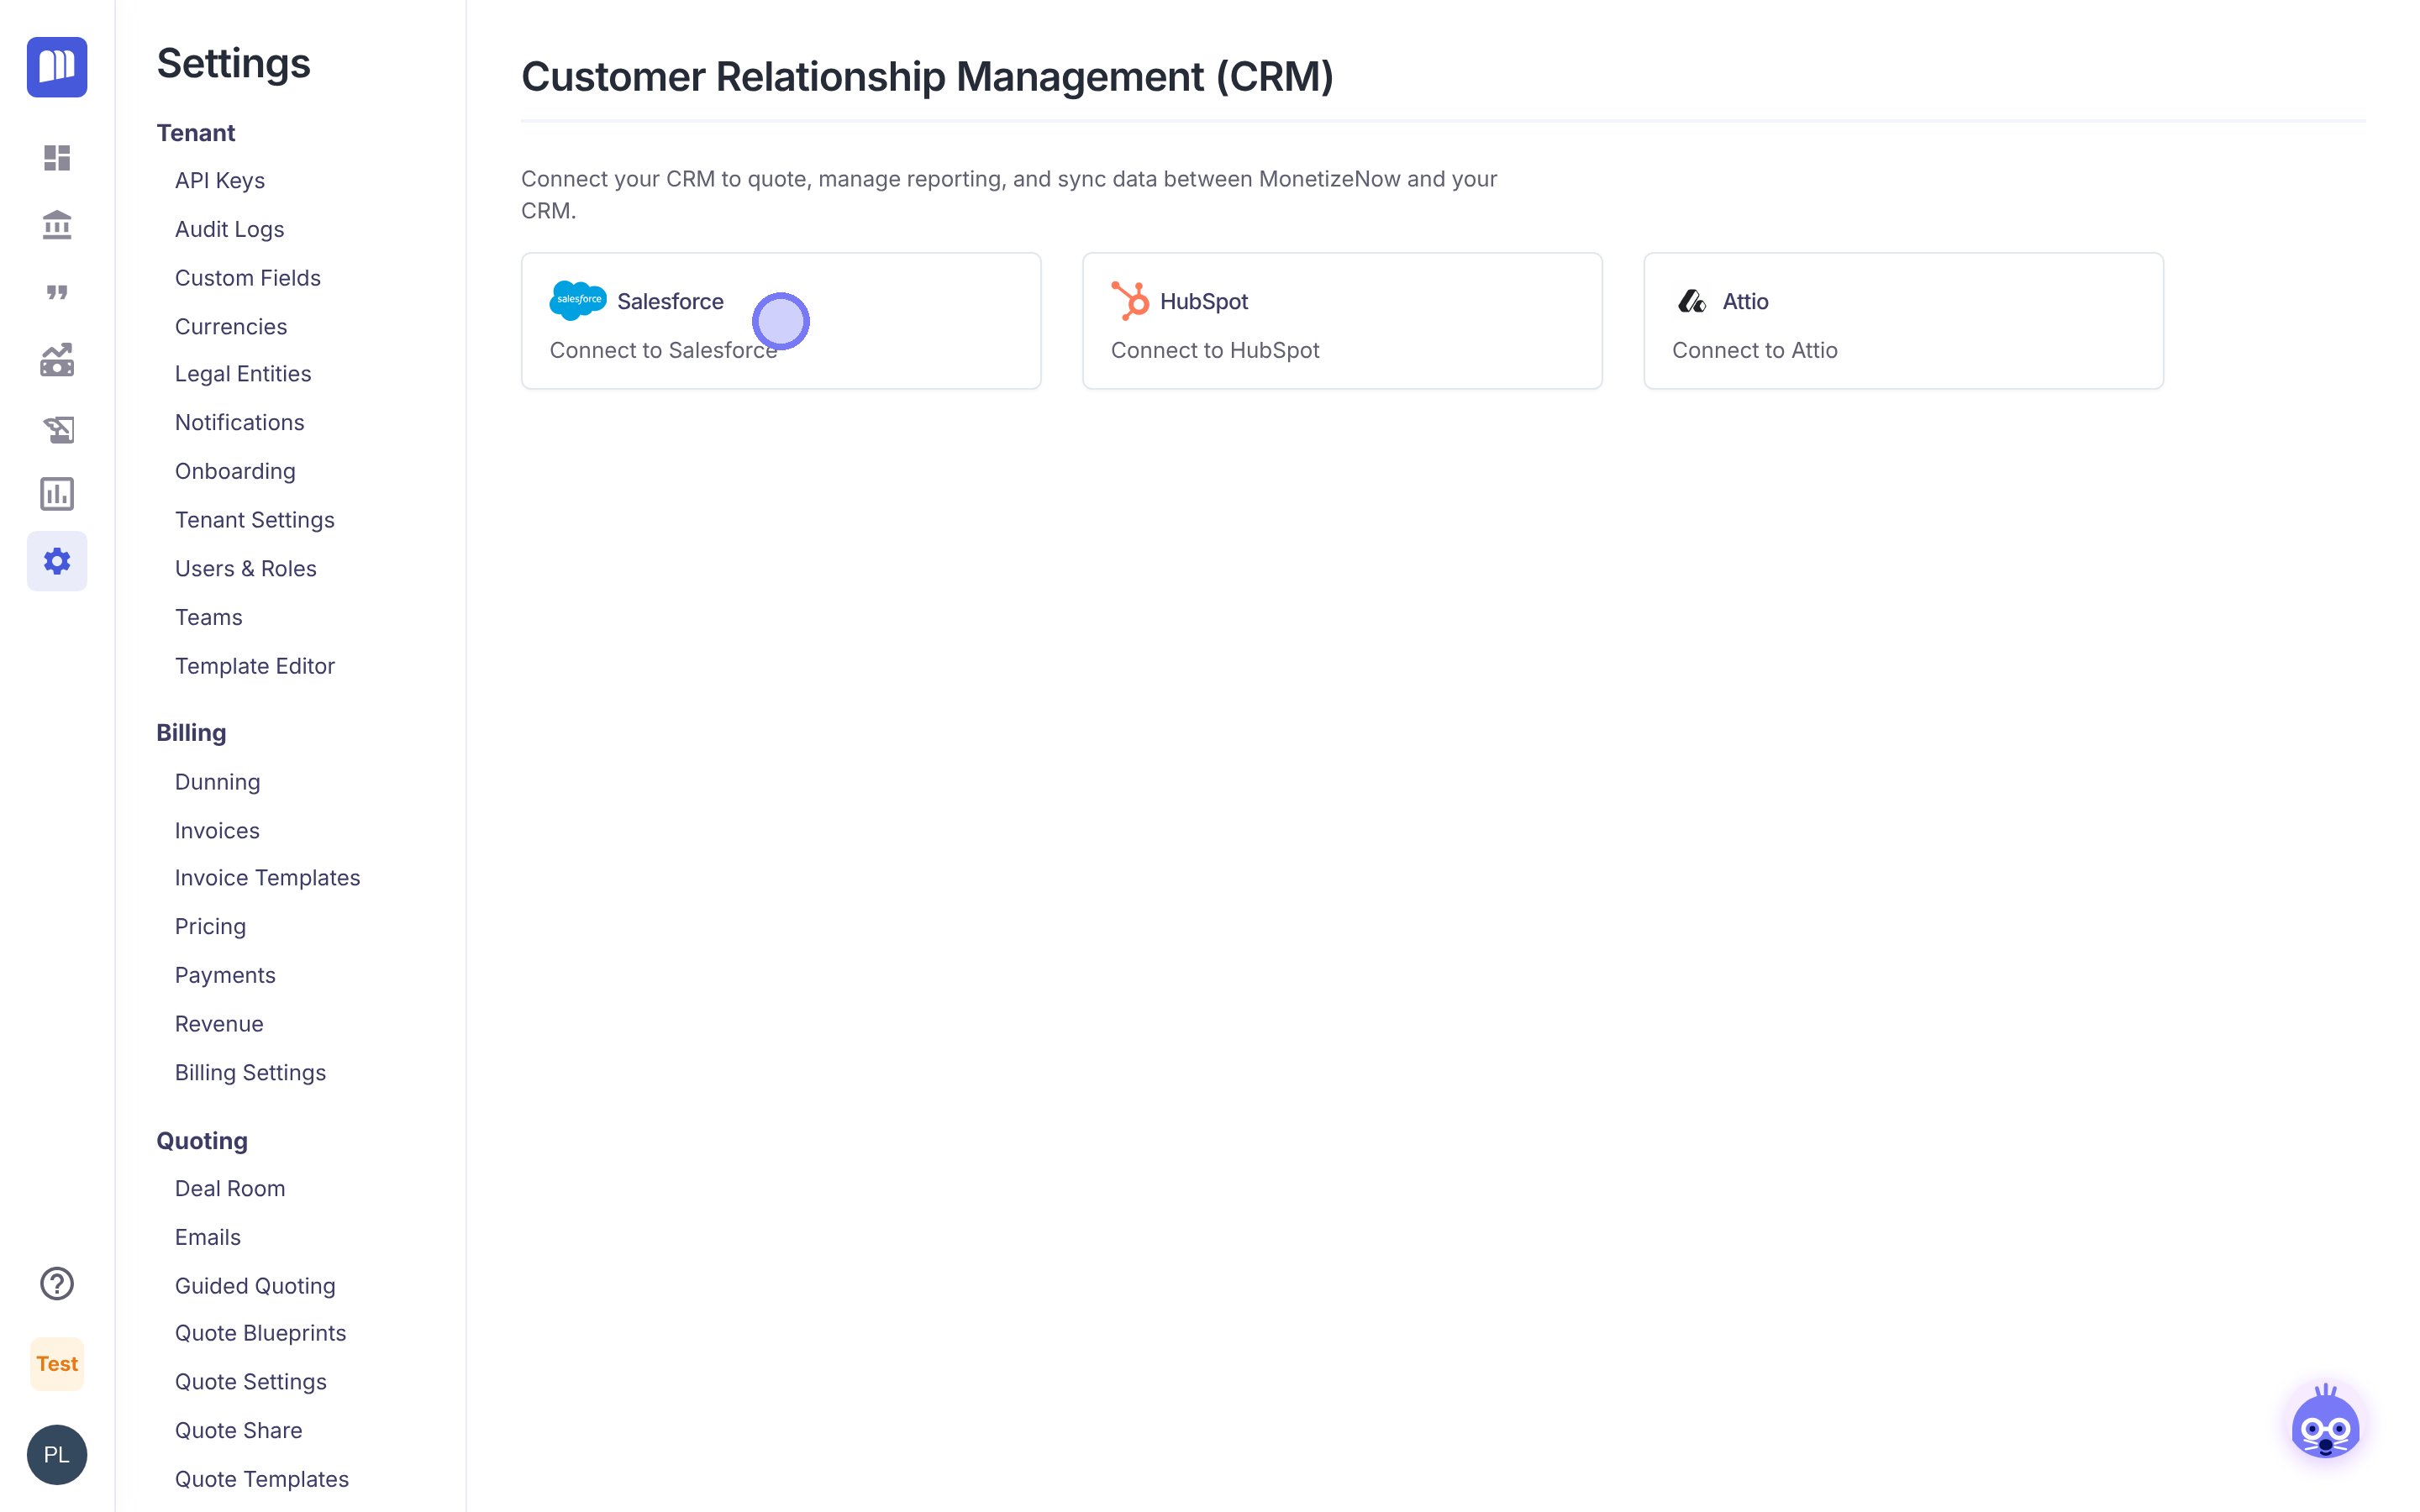
Settings → Integrations → CRM: click a provider card to connect it
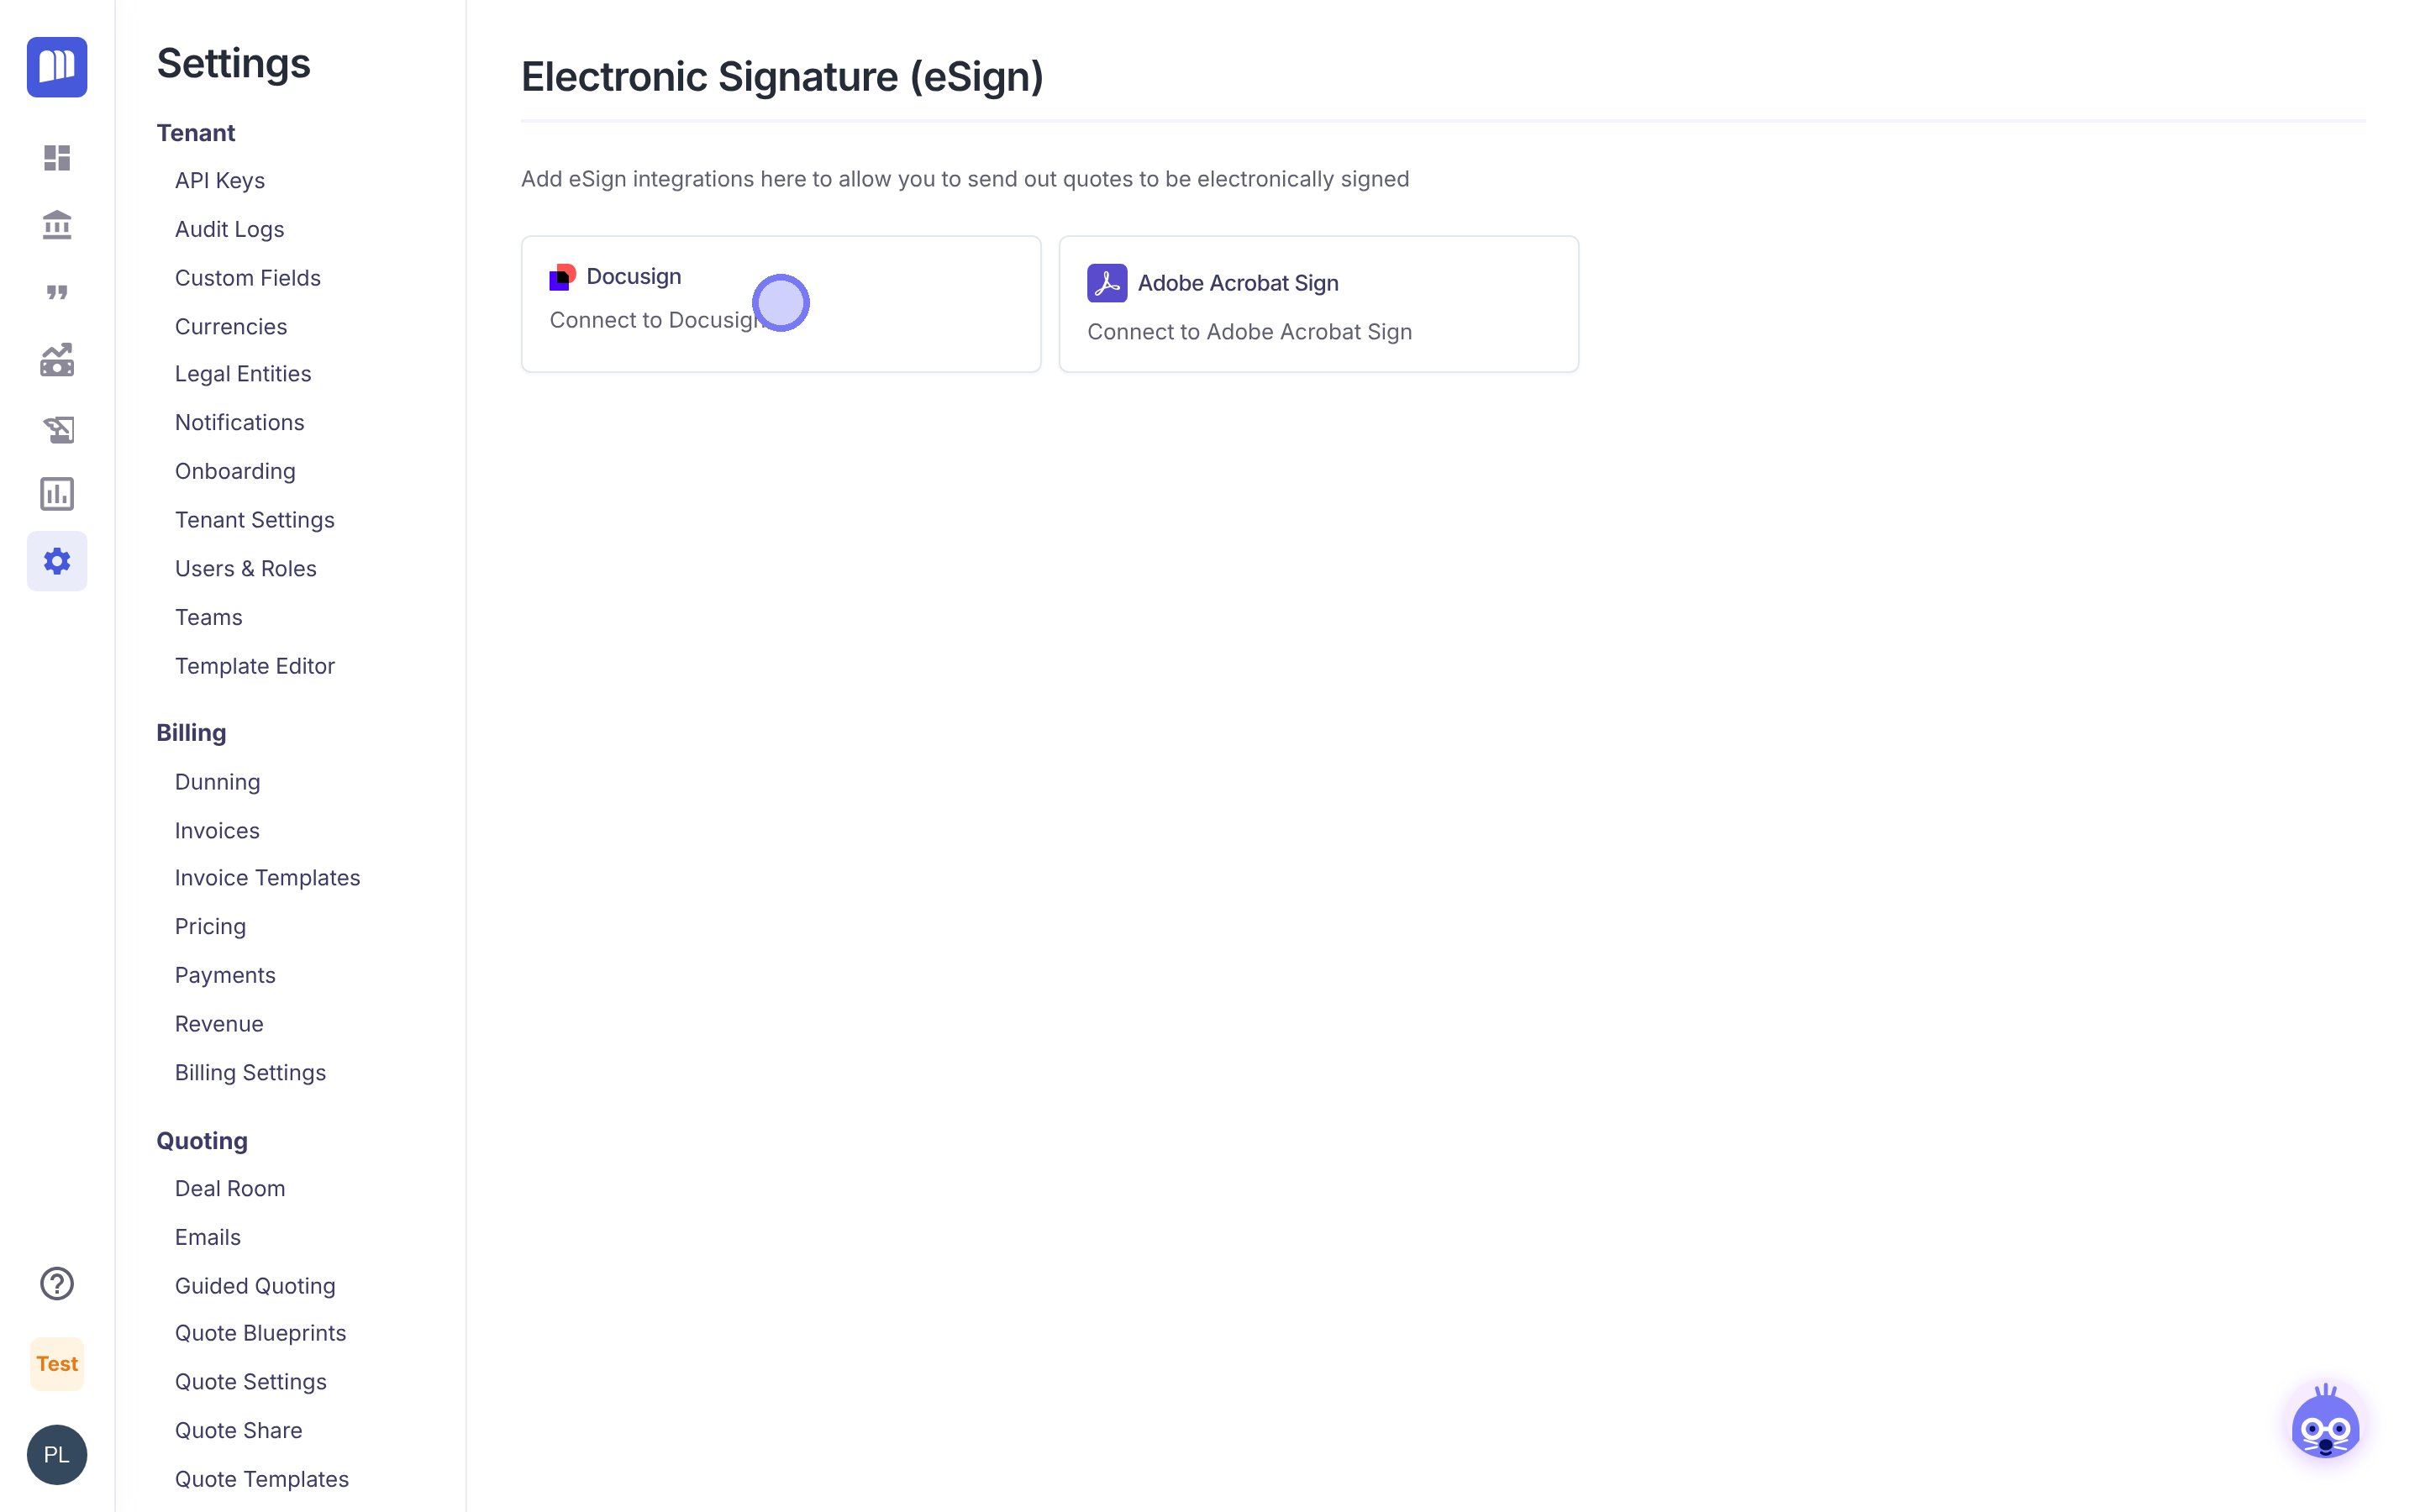
Settings → Integrations → eSign
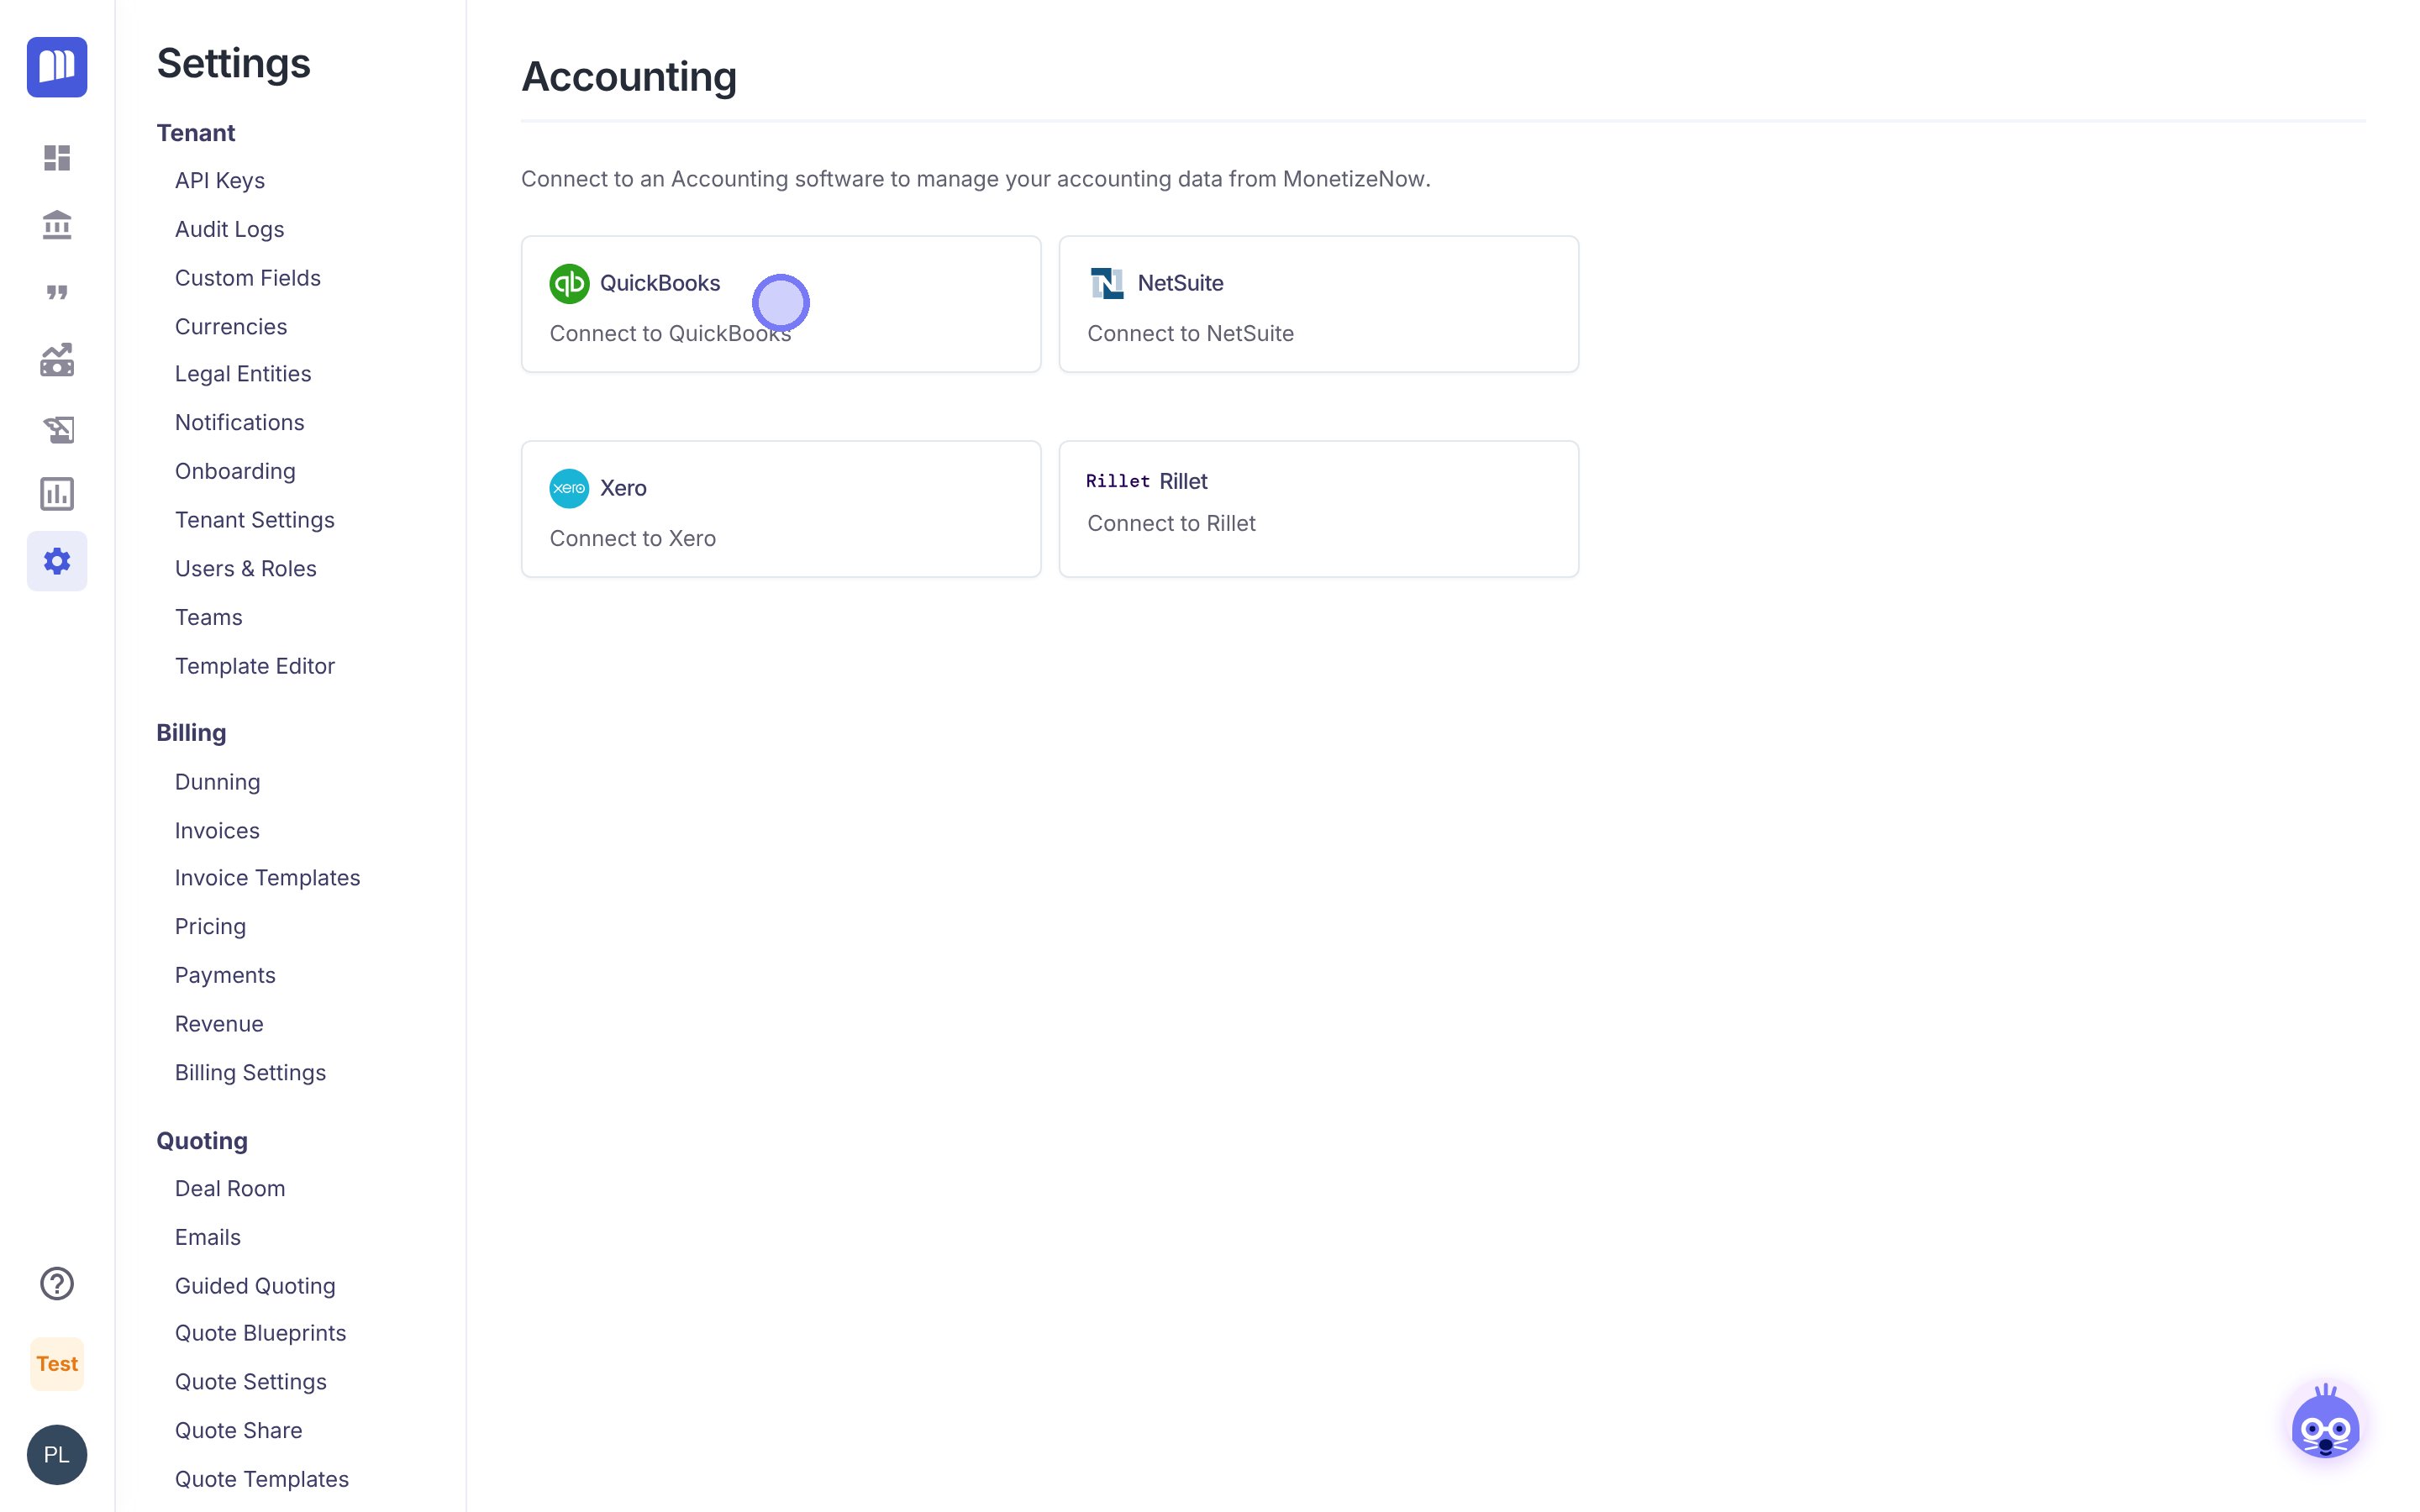
Settings → Integrations → Accounting
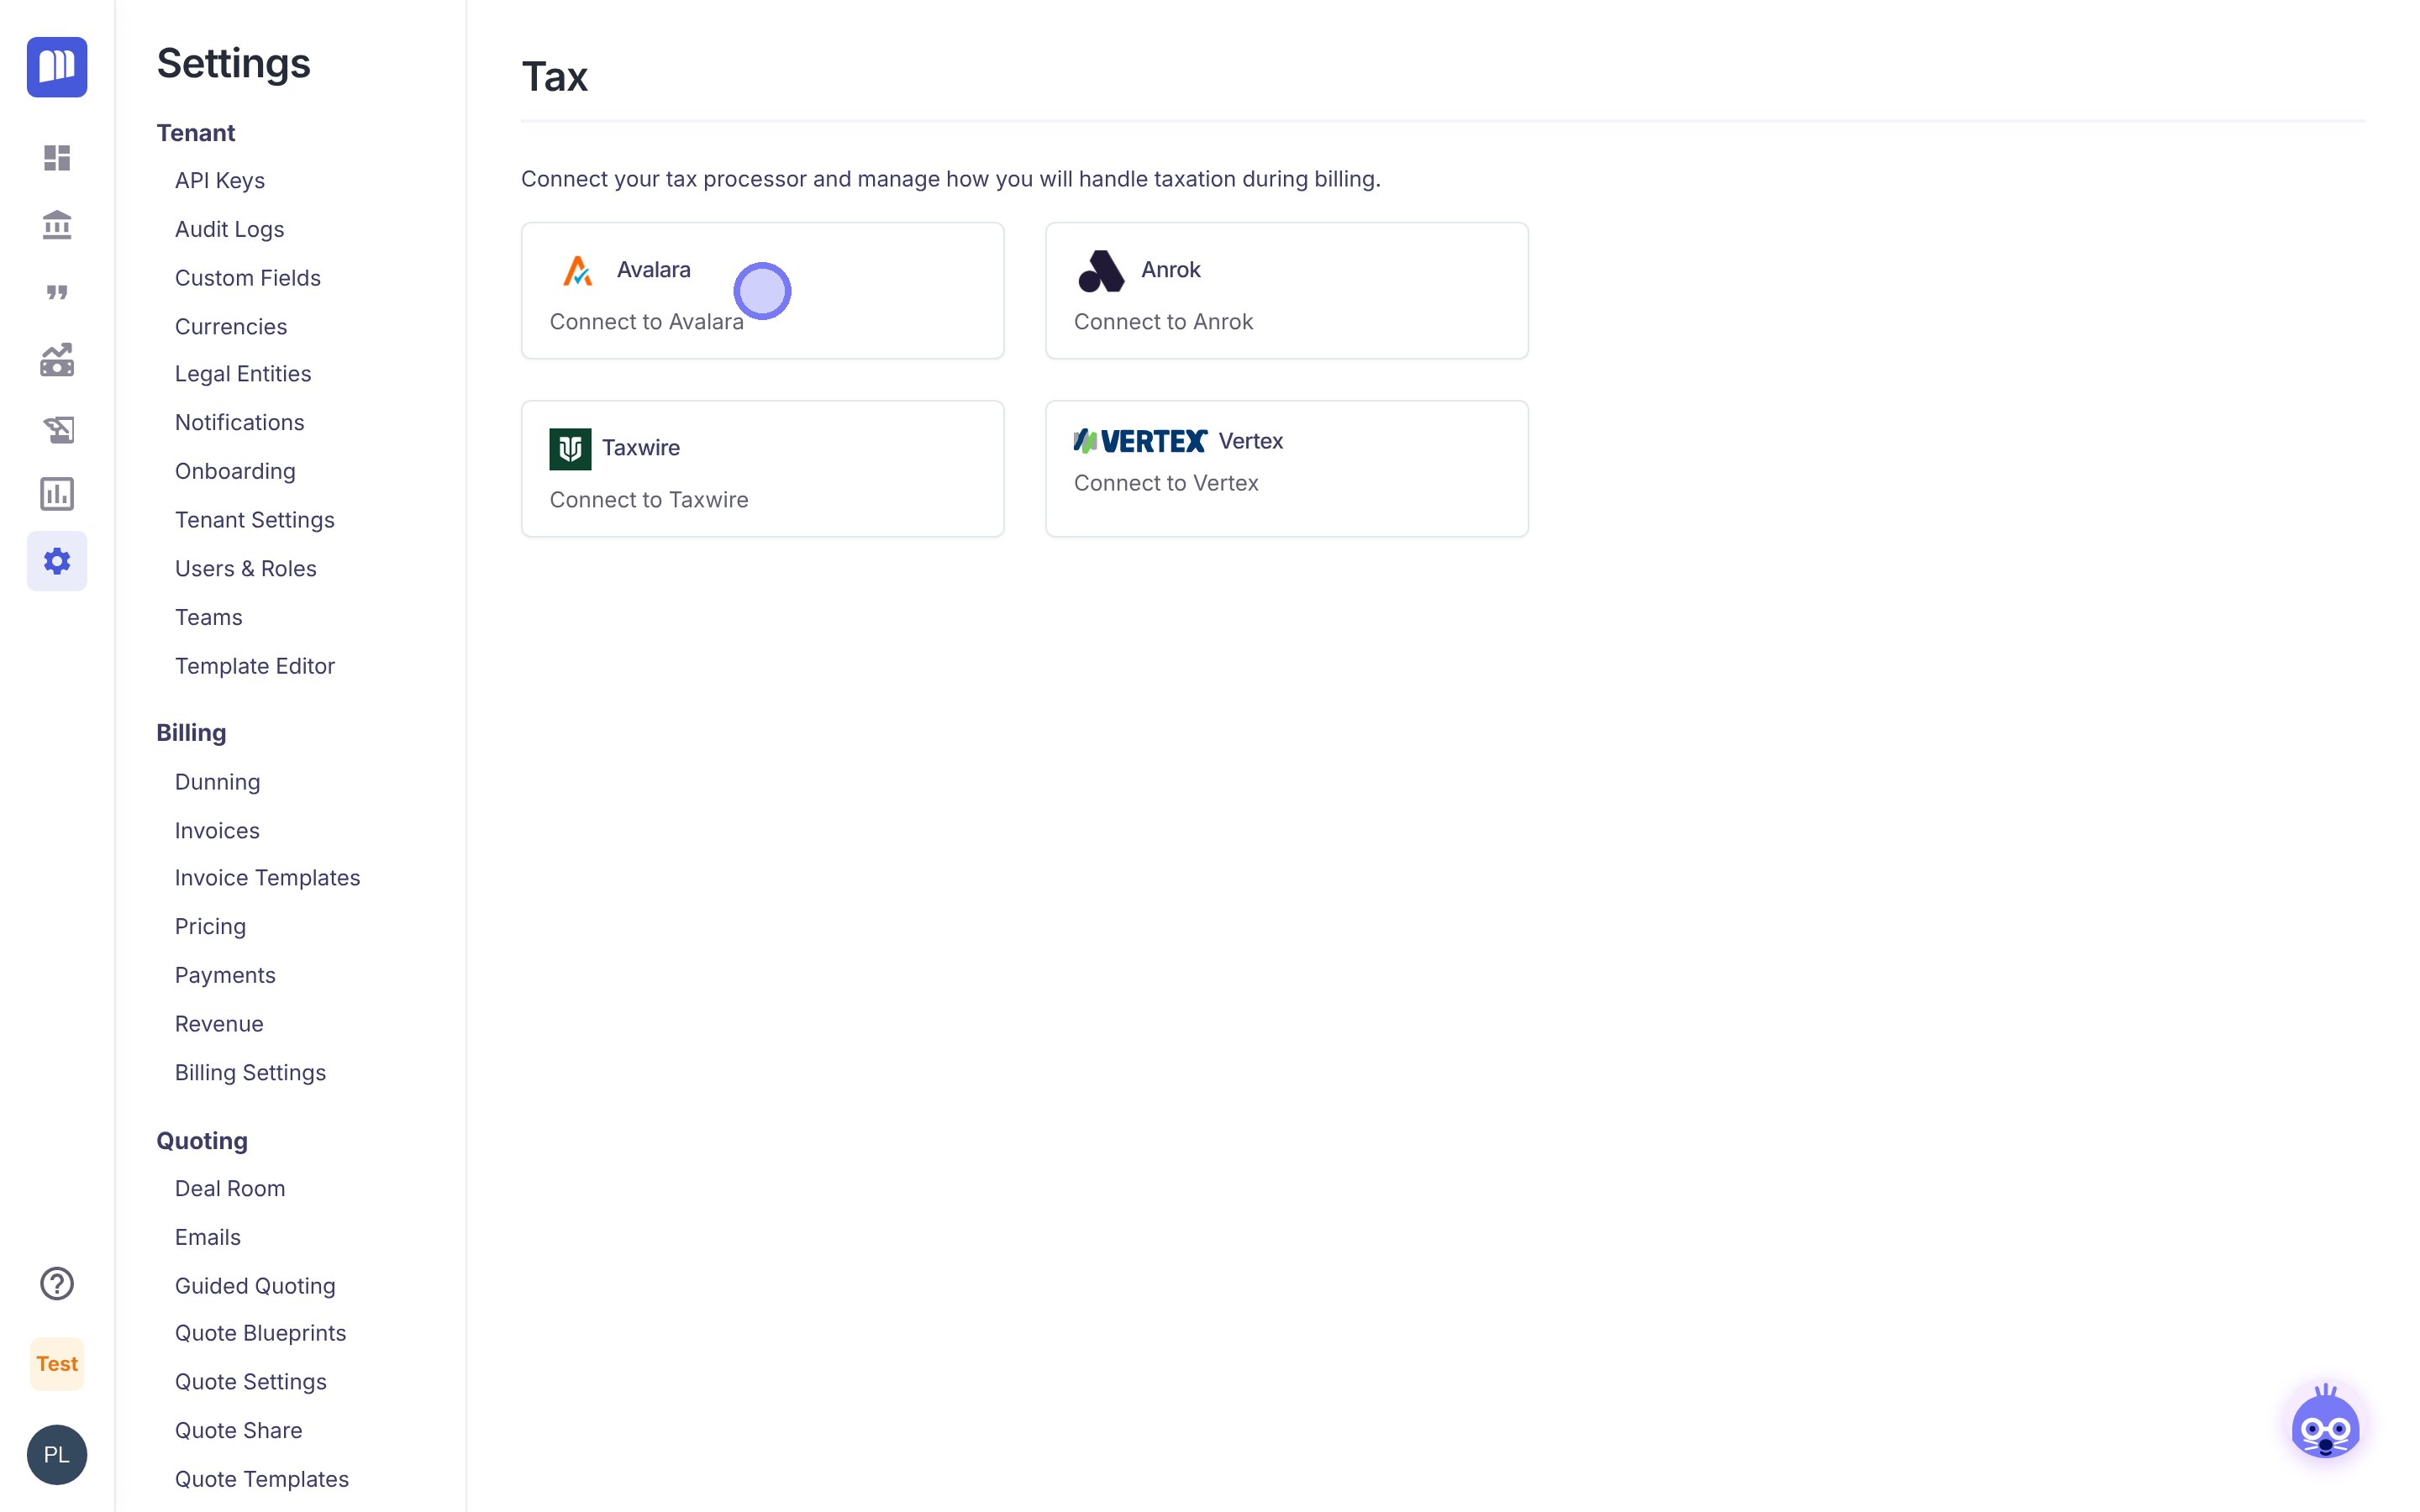
Settings → Integrations → Tax
Work with the MonetizeNow team on: custom fields for your CRM and accounting system, and Webhooks (Settings → Integrations → Webhooks) to send MonetizeNow data to other tools.
Configure your catalog
Where: Product Catalog in the left-hand menu, or Settings → Tenant → Onboarding → 2. Configure Catalog to bulk upload.
- Design your packaging. Decide on your products, how they bundle into offerings, and how each offering is priced (its rates).
- Create products. In Product Catalog, create a Product for each thing you sell, or upload many at once from the Onboarding page: open Add Products, click the download icon to get the template, fill it in, then drag and drop the file or click Browse (CSV or XLSX, 10 MB or less). Create Offerings and Price Offerings work the same way.
- Create offerings. Create an Offering that bundles one or more products. Mark products as optional where reps should choose.
- Add rates. Add a rate to each offering for each billing frequency and currency you sell in.
- Add discounts and usage types if you need them (the Discounts and Usage Types tabs).
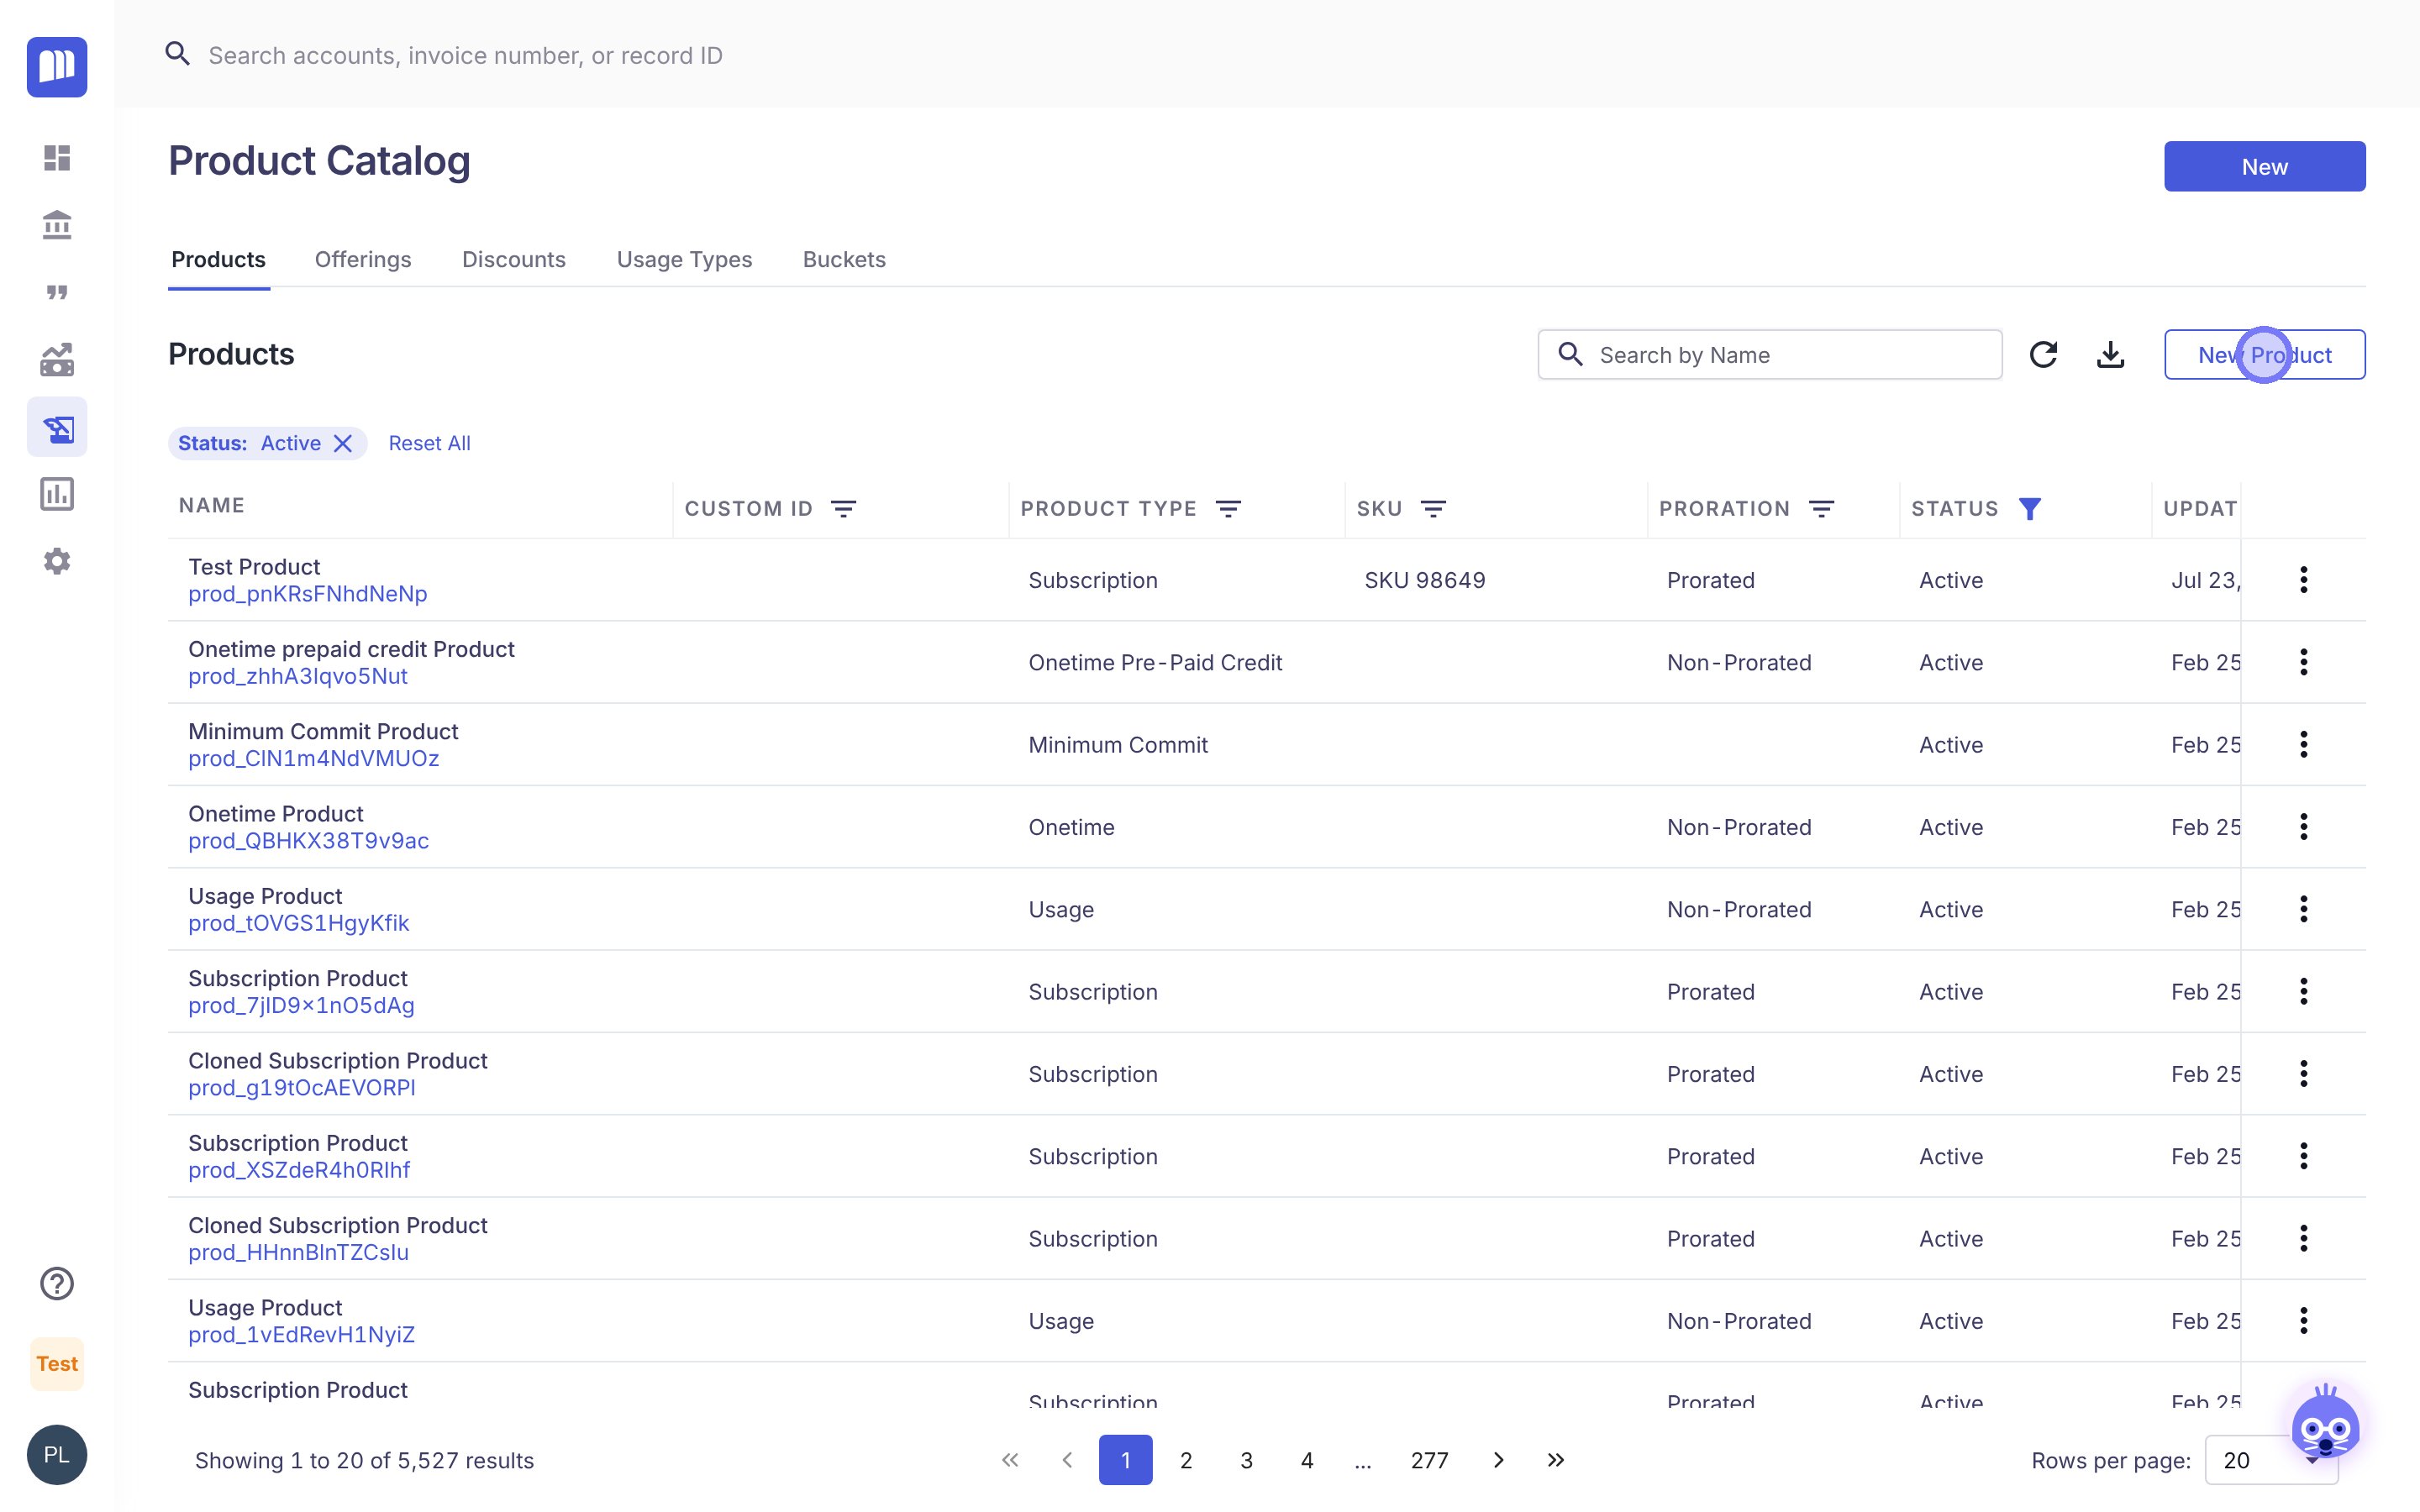
Product Catalog: use the tabs to switch between products, offerings, discounts and usage types, and click New Product to add one
Work with the MonetizeNow team on: advanced products (minimum commits, usage, credits) and pricing models (percent of total, tiered, volume discounts).
Configure quote settings and rules
Where: Settings → Rules and Settings → Quoting. Role: Tenant Admin or Sales Admin.
- Approval Rules (Settings → Rules → Approval Rules): set up your deal desk. Decide what triggers an approval, who approves, and in what order (Rule Order: lower numbers go first).
- Validation Rules (Settings → Rules → Validation Rules): guide reps on what they can and can't quote. For example, Product A and Product B can't be sold together. Each rule shows an Error, Warning or Info message. An Error blocks submission.
- Conditional Terms (Settings → Rules → Conditional Terms): add terms to a Quote automatically based on what's on it, such as a product-specific term.
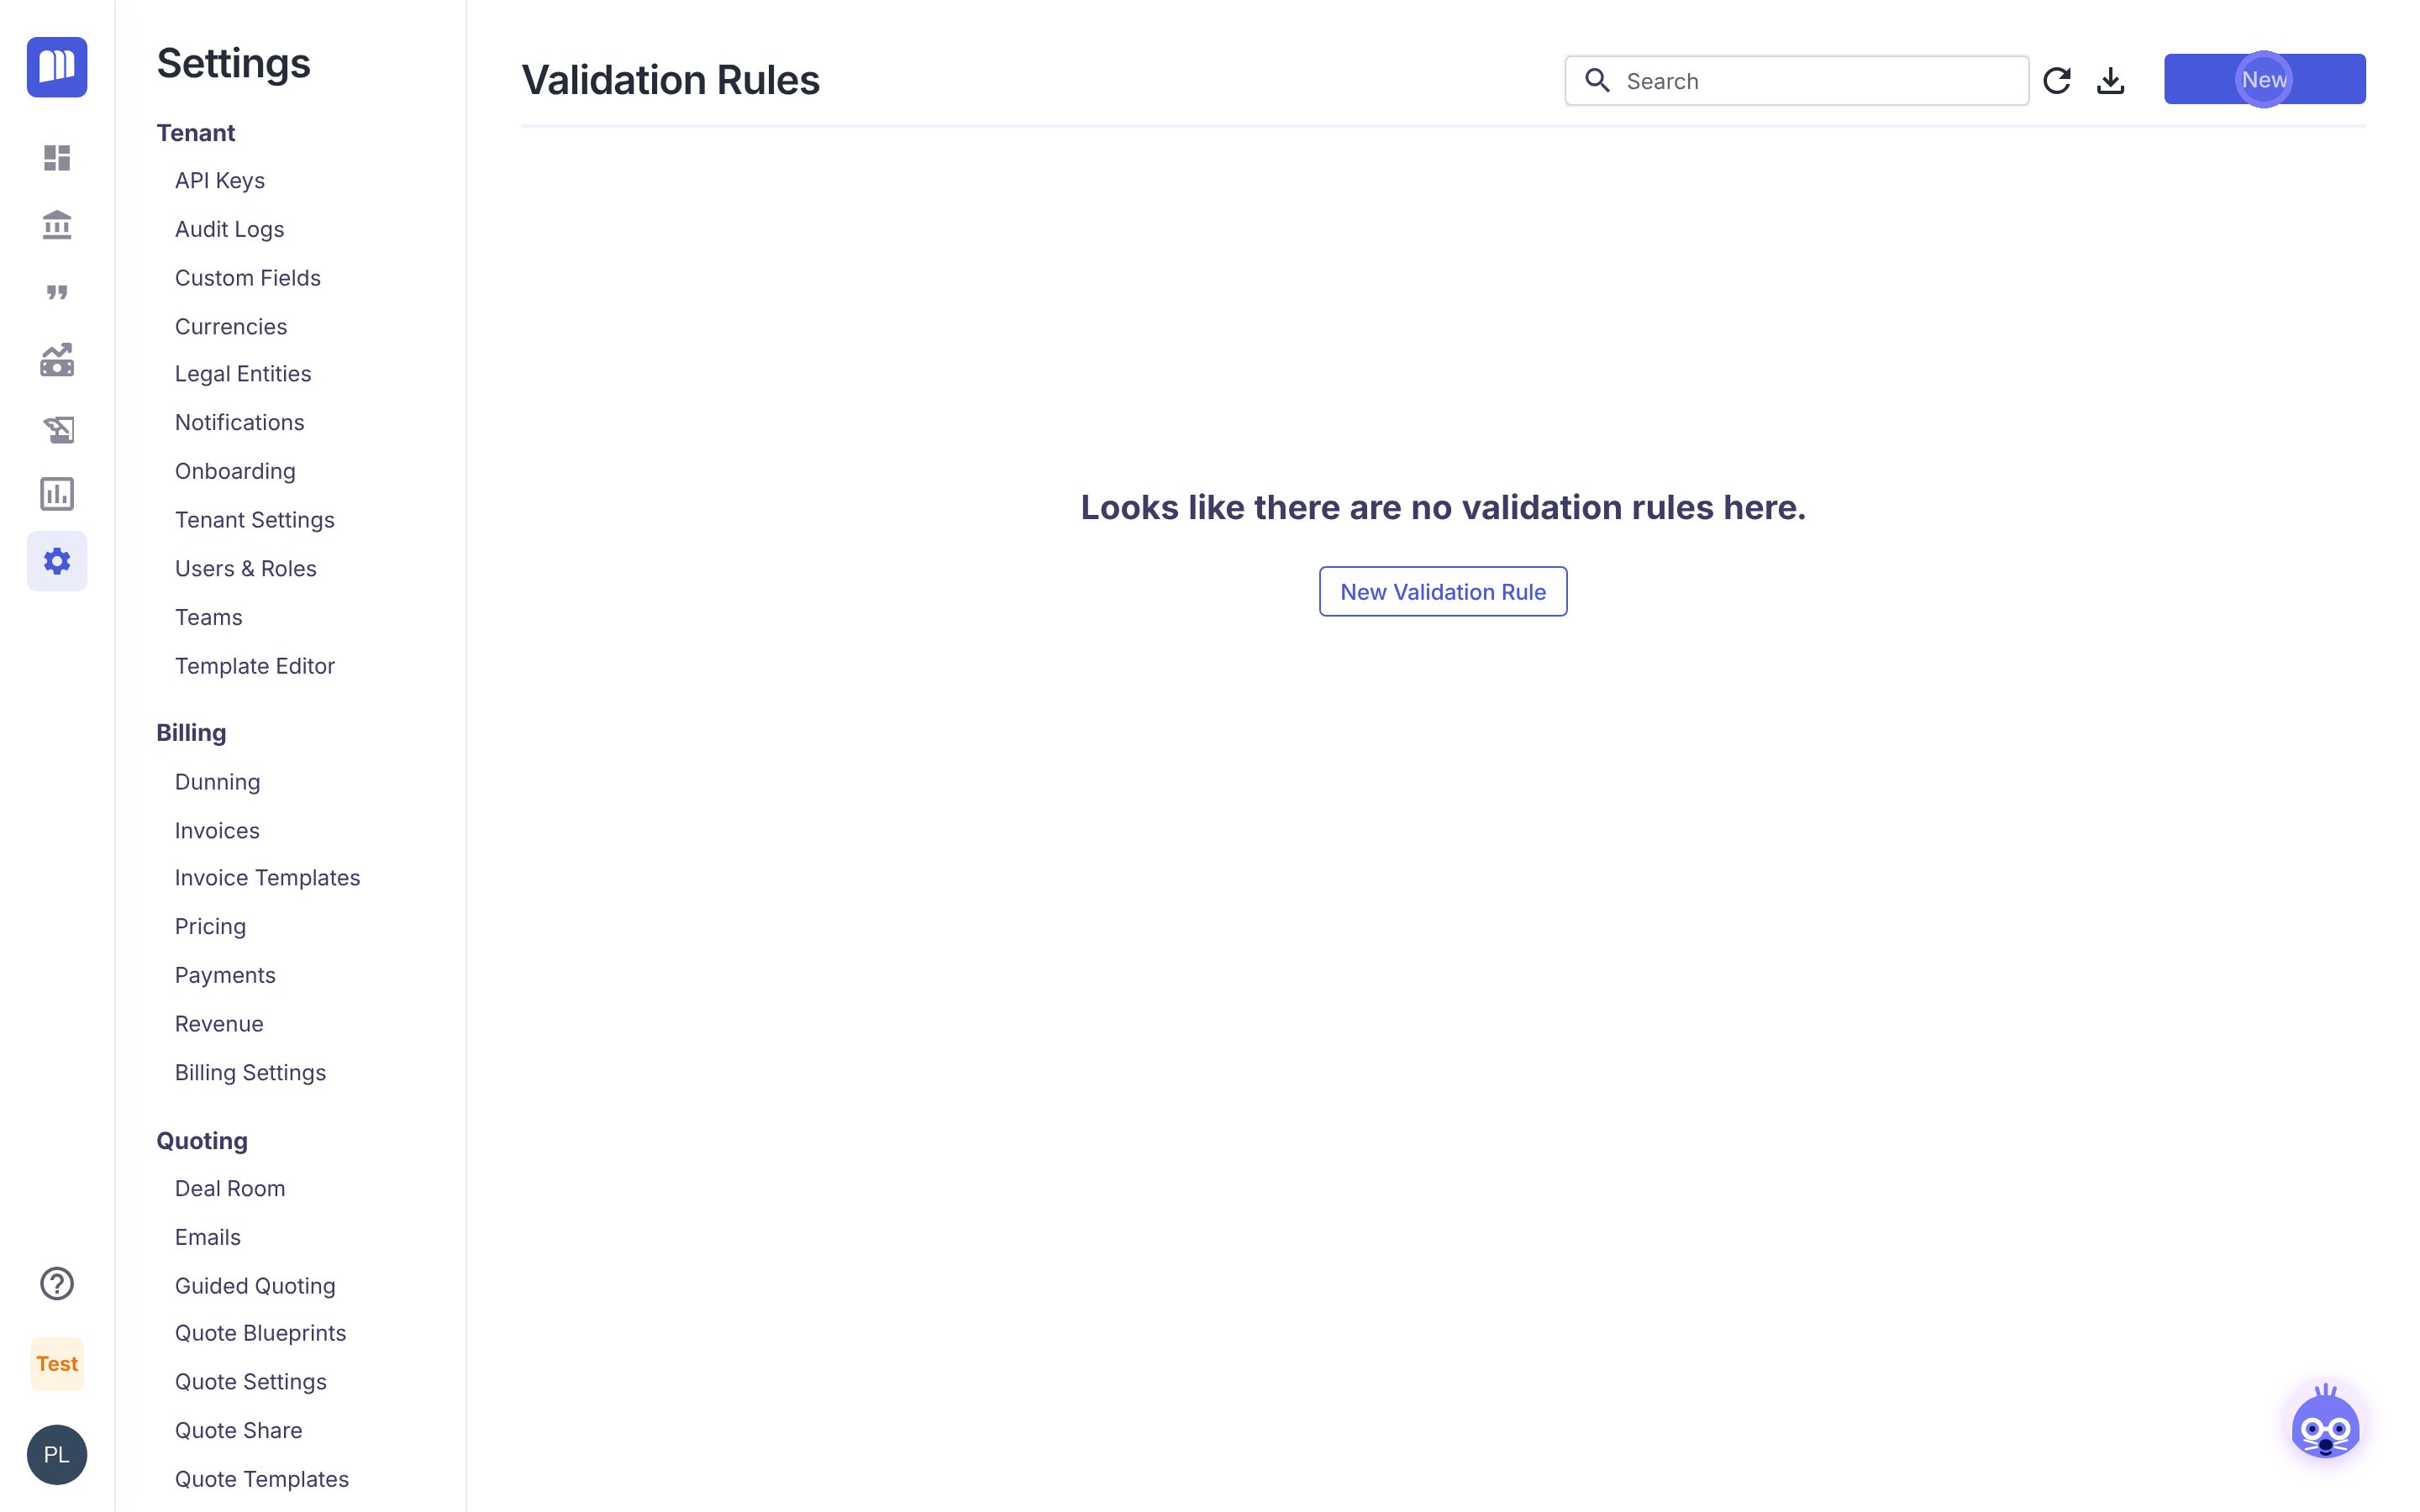
Settings → Rules → Validation Rules: click New to add a rule. Conditional Terms works the same way.
- Quote Blueprints (Settings → Quoting → Quote Blueprints): turn your best Quotes into reusable starting points, so reps don't rebuild the same deal from scratch. To create one, open a Quote, click Use as Blueprint, add a few details and click Create Blueprint. Reps then pick the blueprint in New Quote, and its offerings, contract length and terms fill in automatically. Manage, deactivate or delete blueprints from the Settings page.
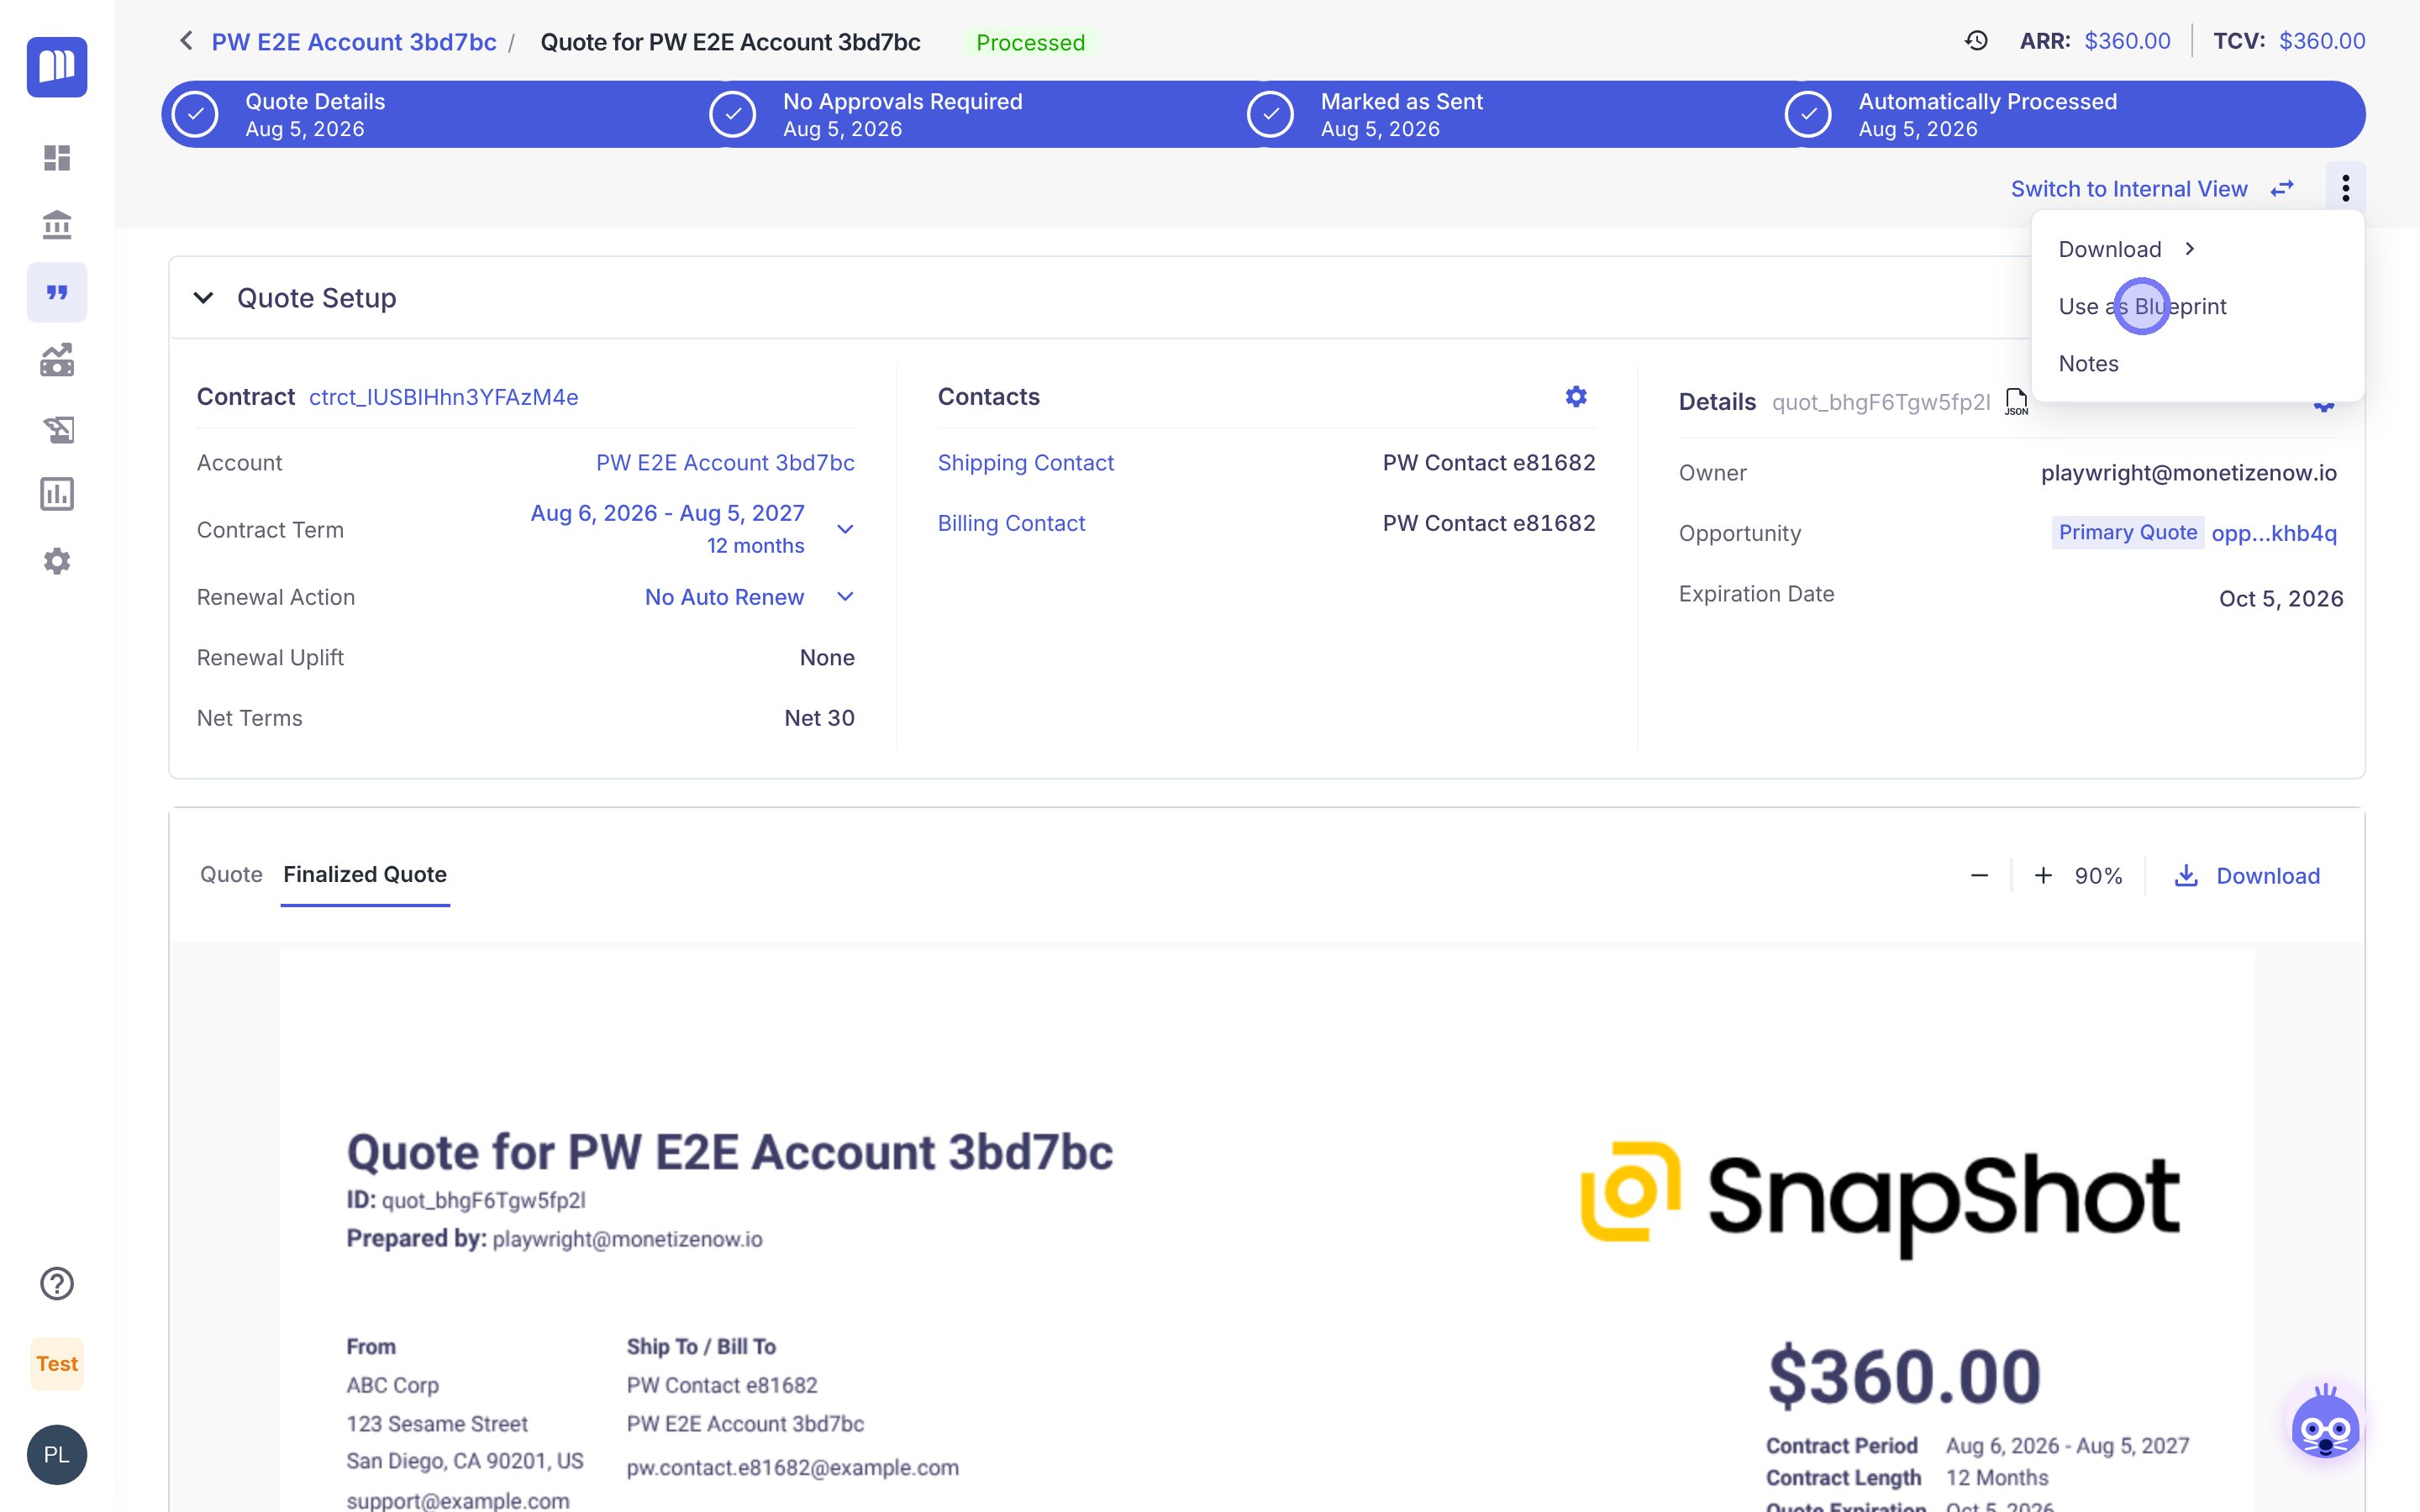
On a Quote, open the ⋮ menu and choose Use as Blueprint
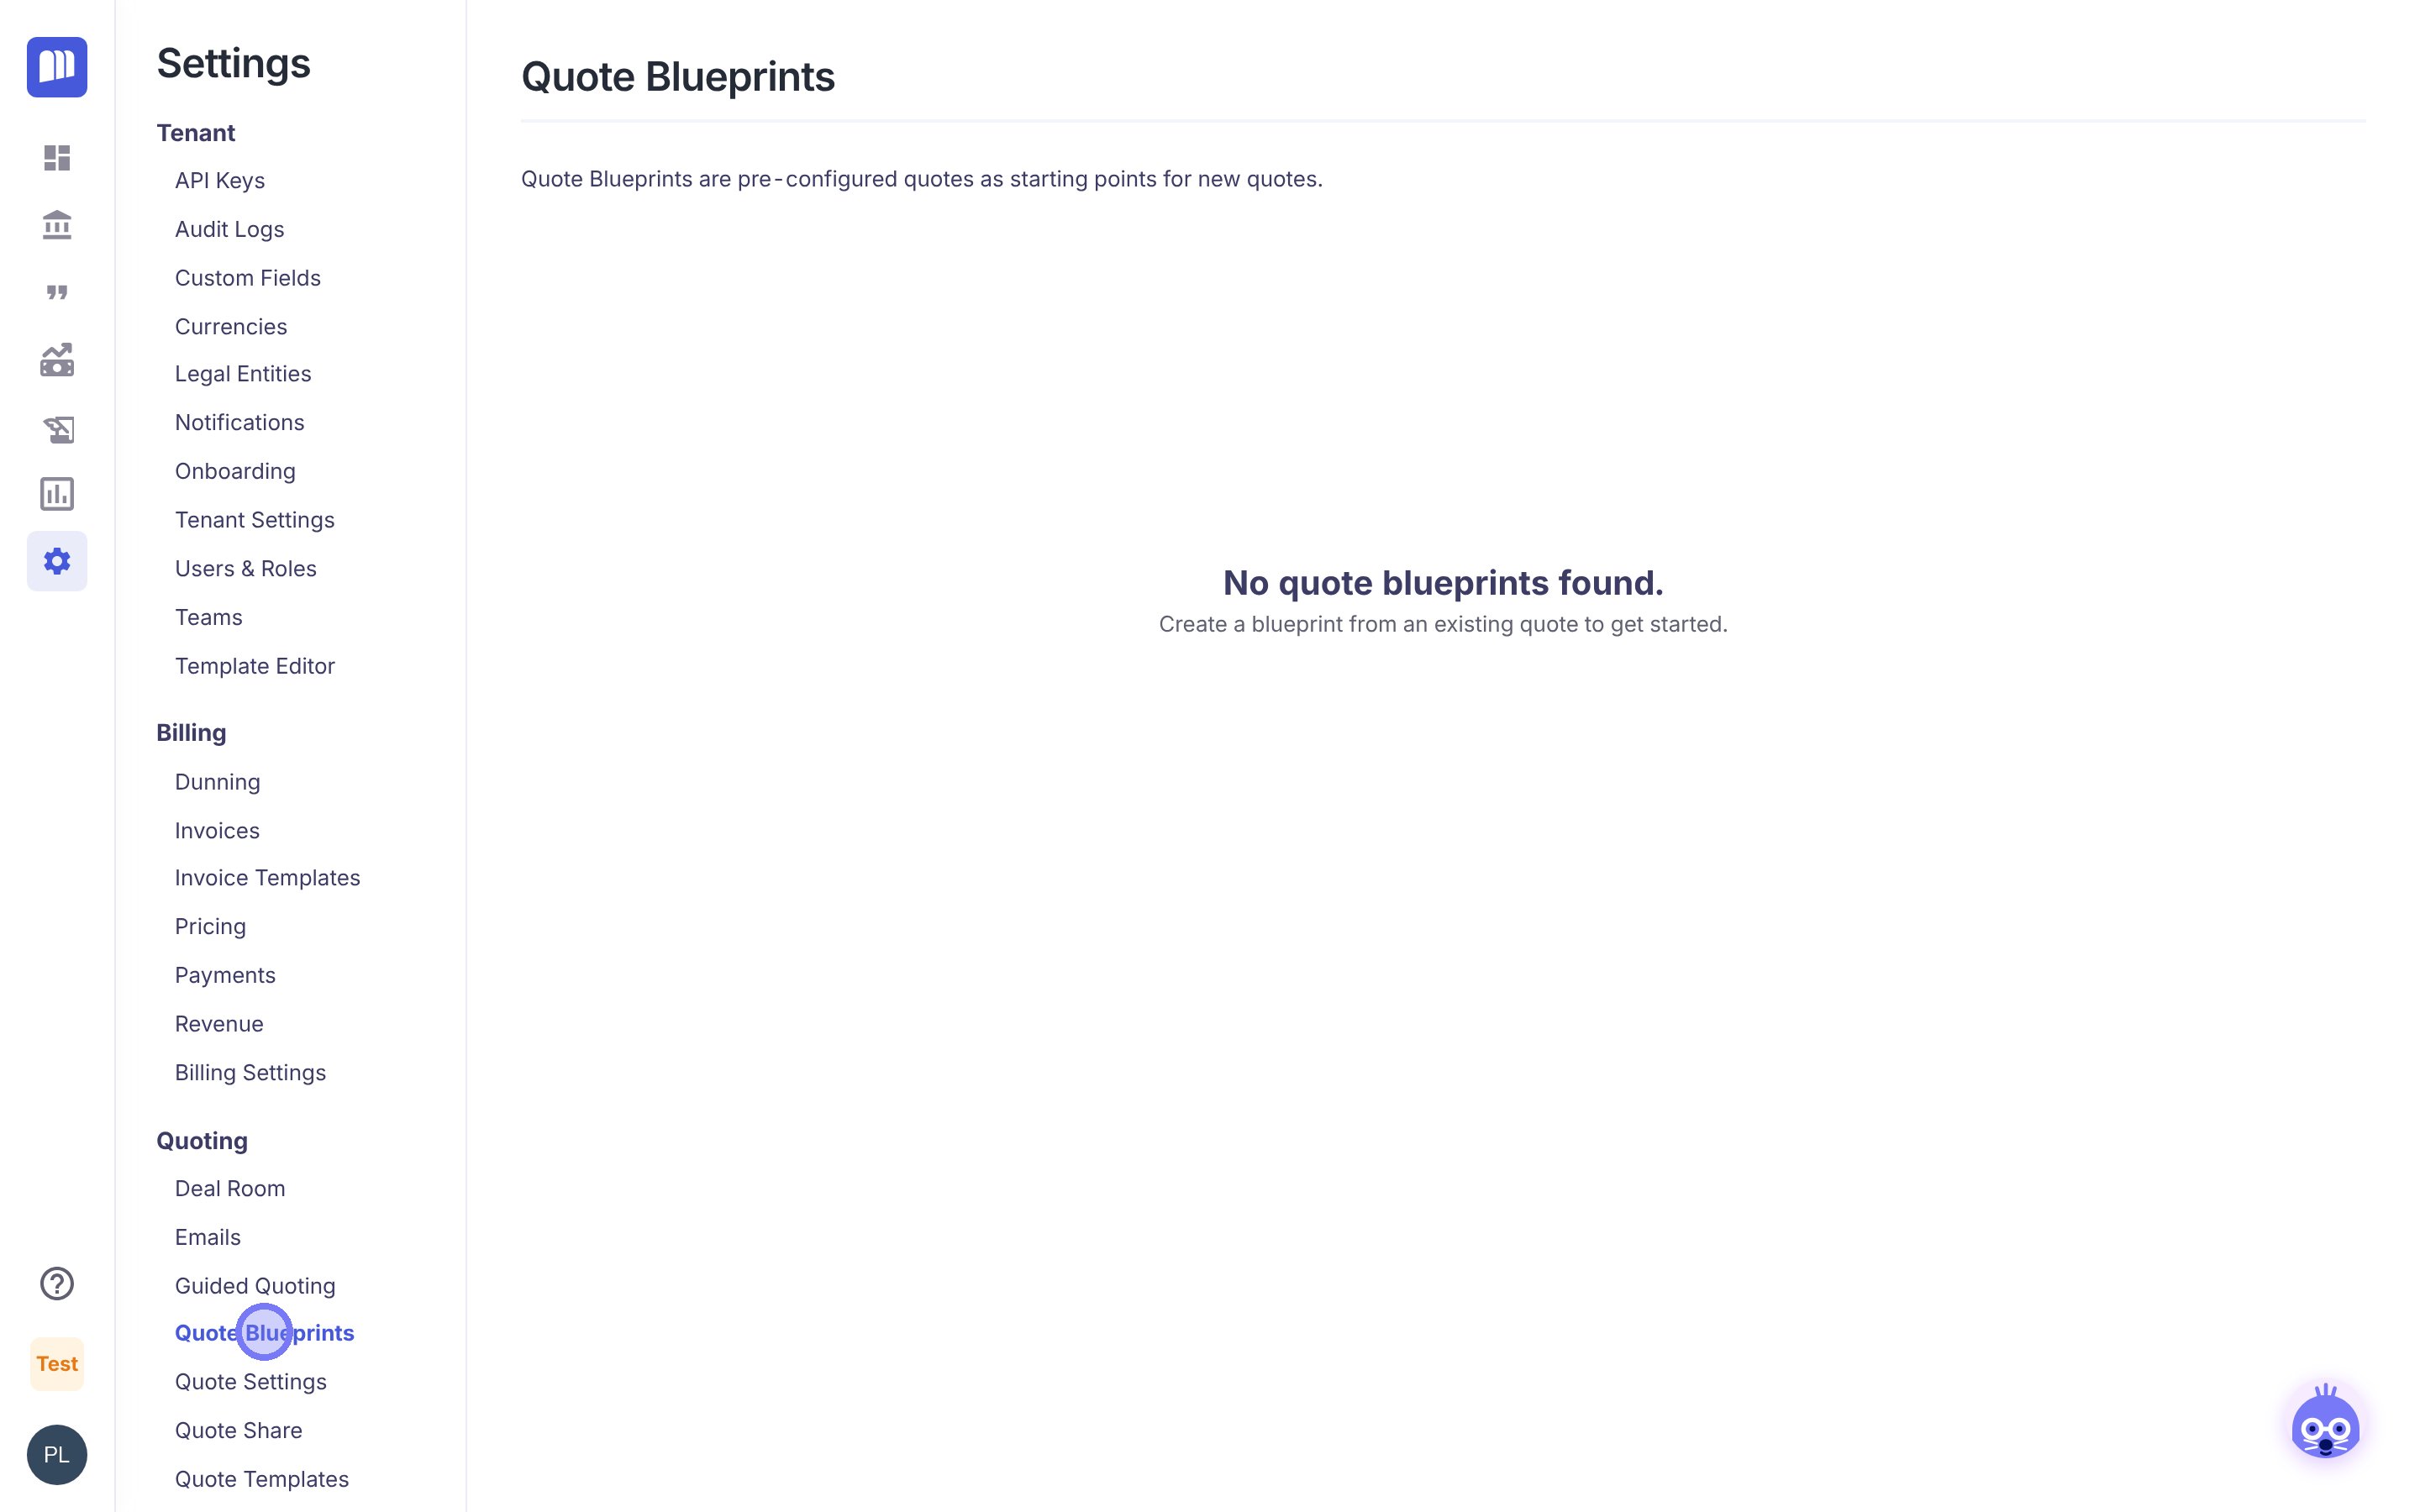
Settings → Quoting → Quote Blueprints lists every blueprint
- Test each rule. Open a rule and use Test Rule with an existing Quote before you rely on it.
▶ Walkthroughs: Step 4 of Set Up Your Company in MonetizeNow builds an approval rule end to end. Creating a Quote Blueprint shows how to save and reuse a Quote.
Quote faster with Monty
Monty is the AI assistant built into MonetizeNow. Ask it about your Quotes, billing and customer data in plain English, with no reports to build.
- Open Monty. Click the Monty button in the bottom-right corner of any page.
- Ask from where you are. Monty knows which Quote, invoice or account you're viewing. Open a Quote first, then ask about this quote.
- Start with a suggestion. Monty suggests questions based on the page you're on, or you can type your own in Ask Monty anything....
- Check before you act. AI answers may not be 100% accurate. Confirm anything that affects pricing or a customer before you act on it.
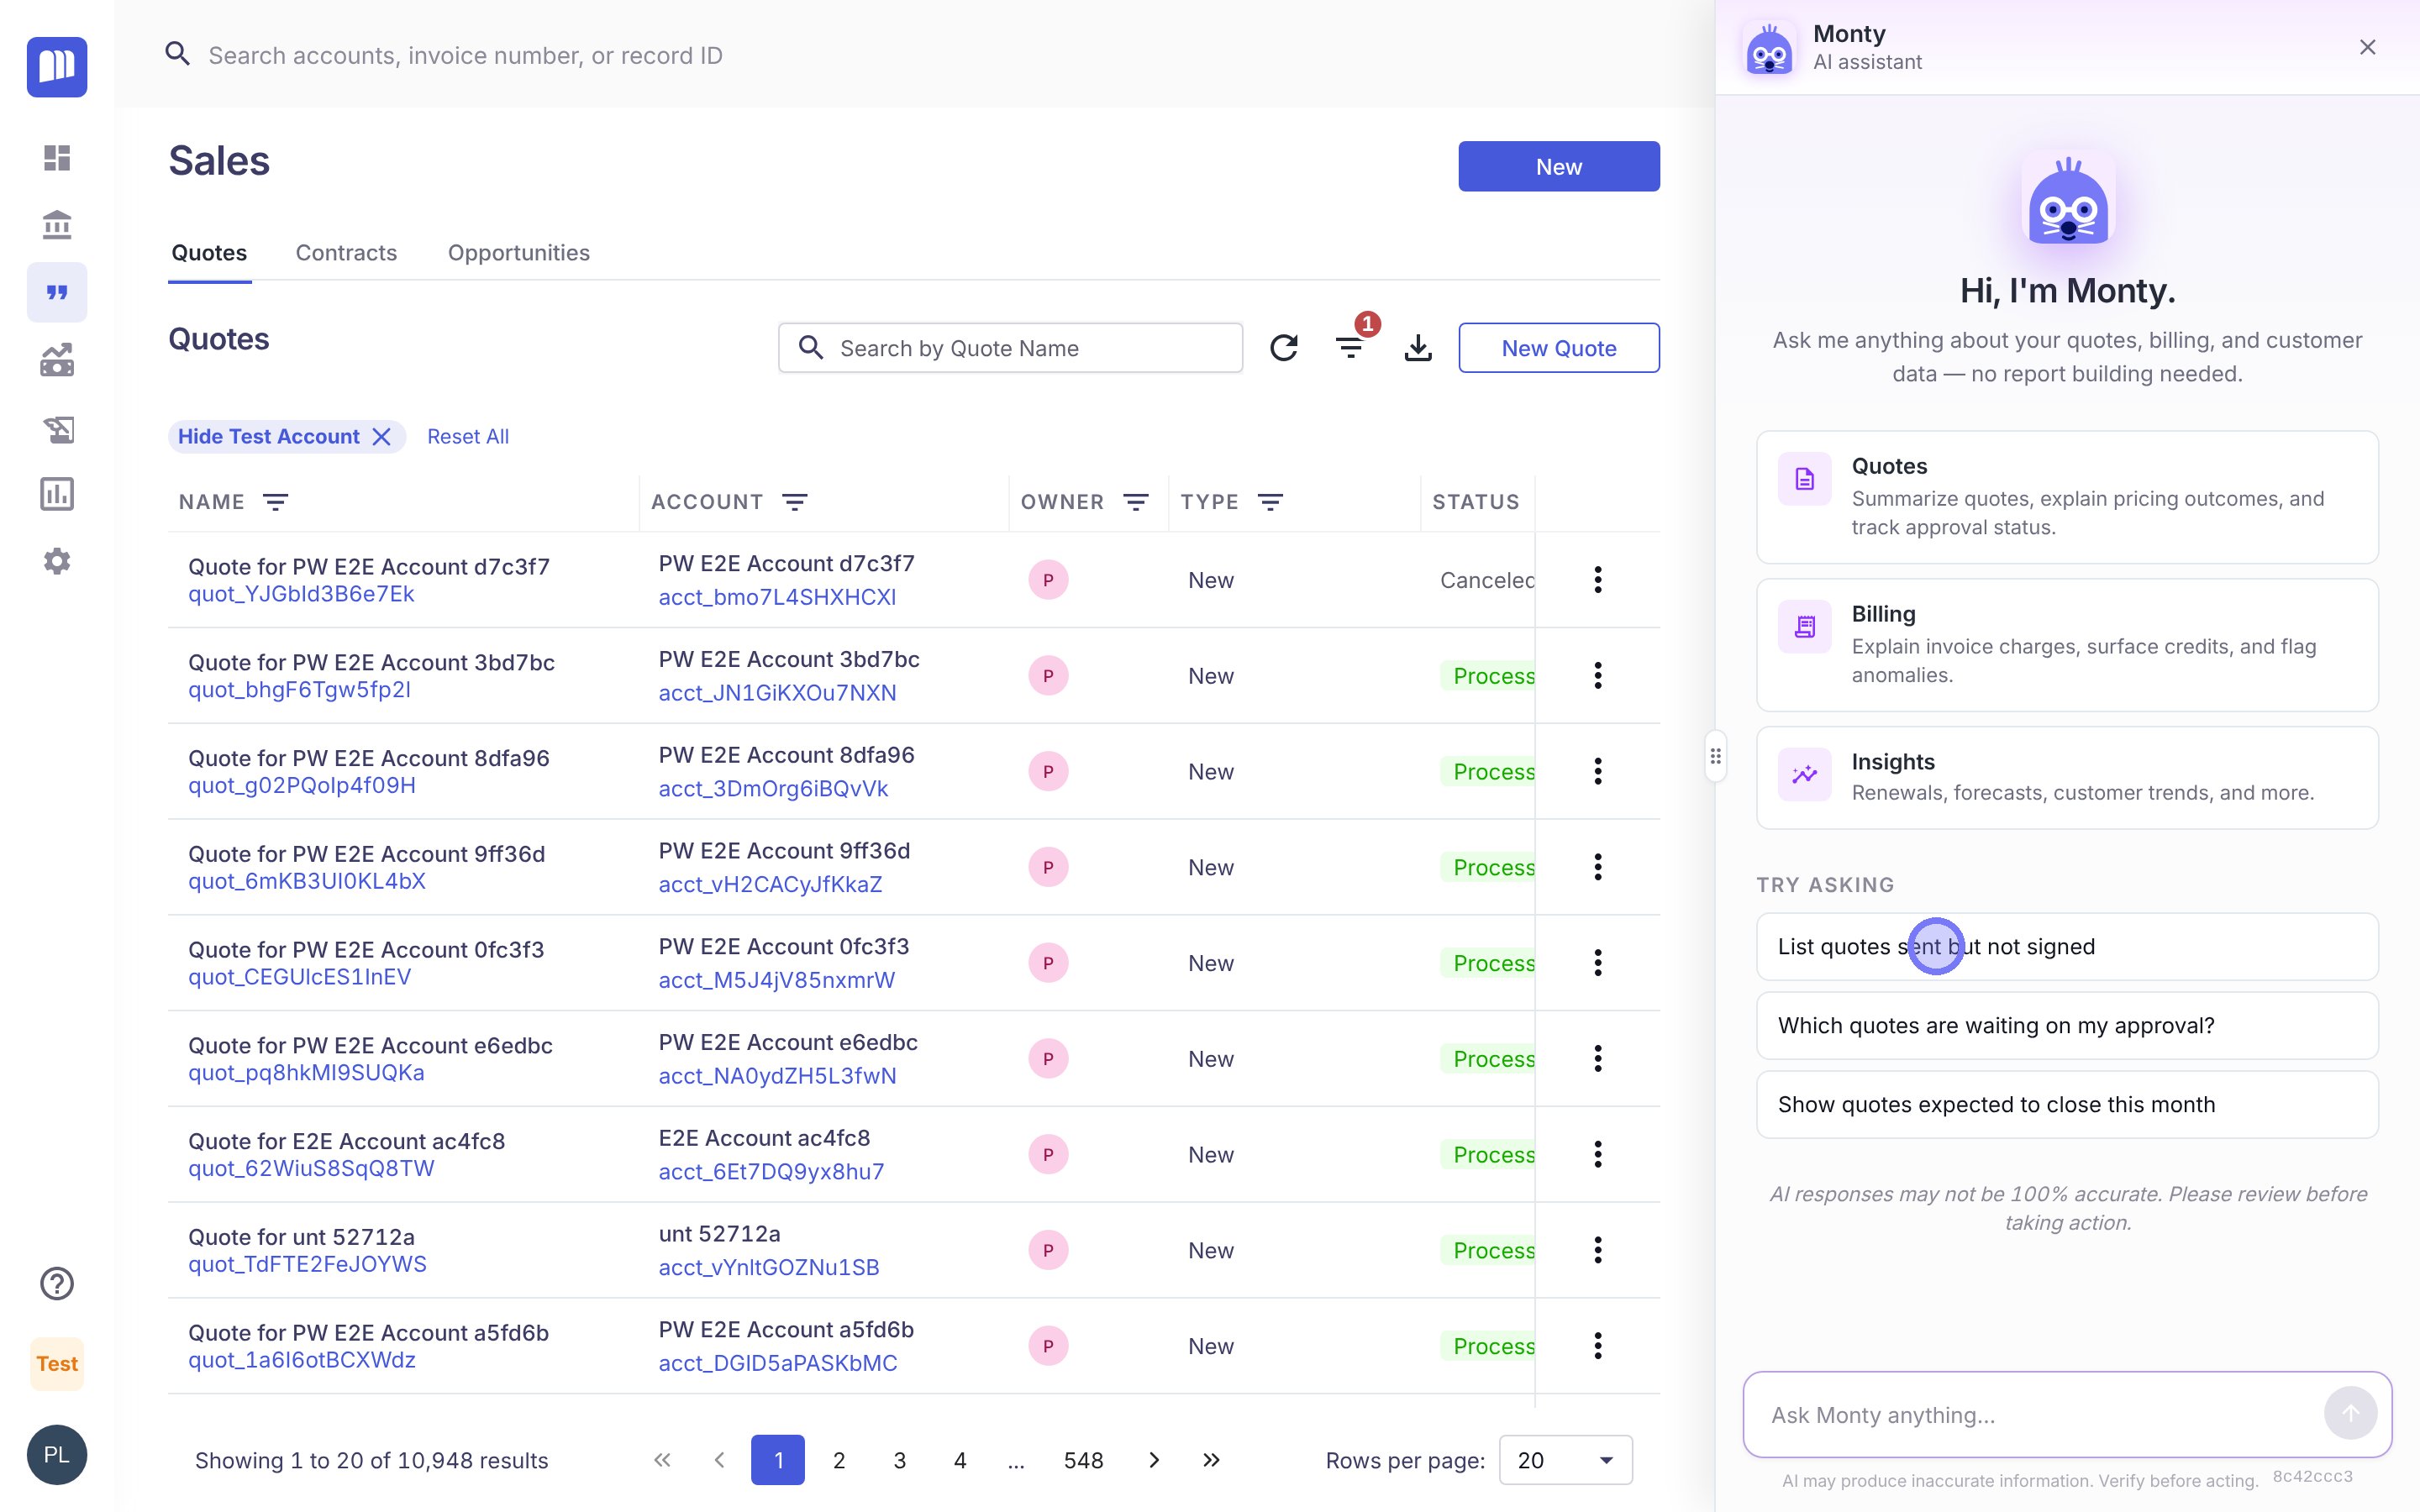
Monty opens beside the page you're on, with suggestions that match it
Try these while you quote:
| On this page | Ask Monty |
|---|---|
| A single Quote | "Sanity-check this quote for pricing issues" |
| A single Quote | "Explain the discounts applied to this quote" |
| A single Quote | "What's blocking approval on this quote?" |
| Quotes list | "List quotes sent but not signed" |
| Quotes list | "Which quotes are waiting on my approval?" |
| Quotes list | "Show quotes expected to close this month" |
| An account | "Summarize this account's contract history" |
| Anywhere | "Show renewals coming up in the next 90 days" |
During testing: use Monty as a second check on your test deals. Ask it to explain a price or a discount and confirm it matches what your catalog and rules should produce.
Test your end-to-end workflow
Where: your sandbox tenant, connected to sandbox versions of your CRM, eSign, payments, accounting and tax systems.
Run each scenario and confirm the result in every connected system:
- CRM to draft Quote. Start a Quote from a CRM opportunity and check the account, contacts and opportunity carried over.
- Draft to approved and processed. Submit a Quote that triggers your rules, approve it, send it for signature and process it. See Create Your First Quote.
- Quote to billing. Check that the processed Quote creates the contract, subscriptions, bill group and first invoice you expect, and that tax and payment work.
- Amend a contract. Open the contract from a processed Quote, click Amend, add quantity or products partway through the term, and check proration and the next invoice.
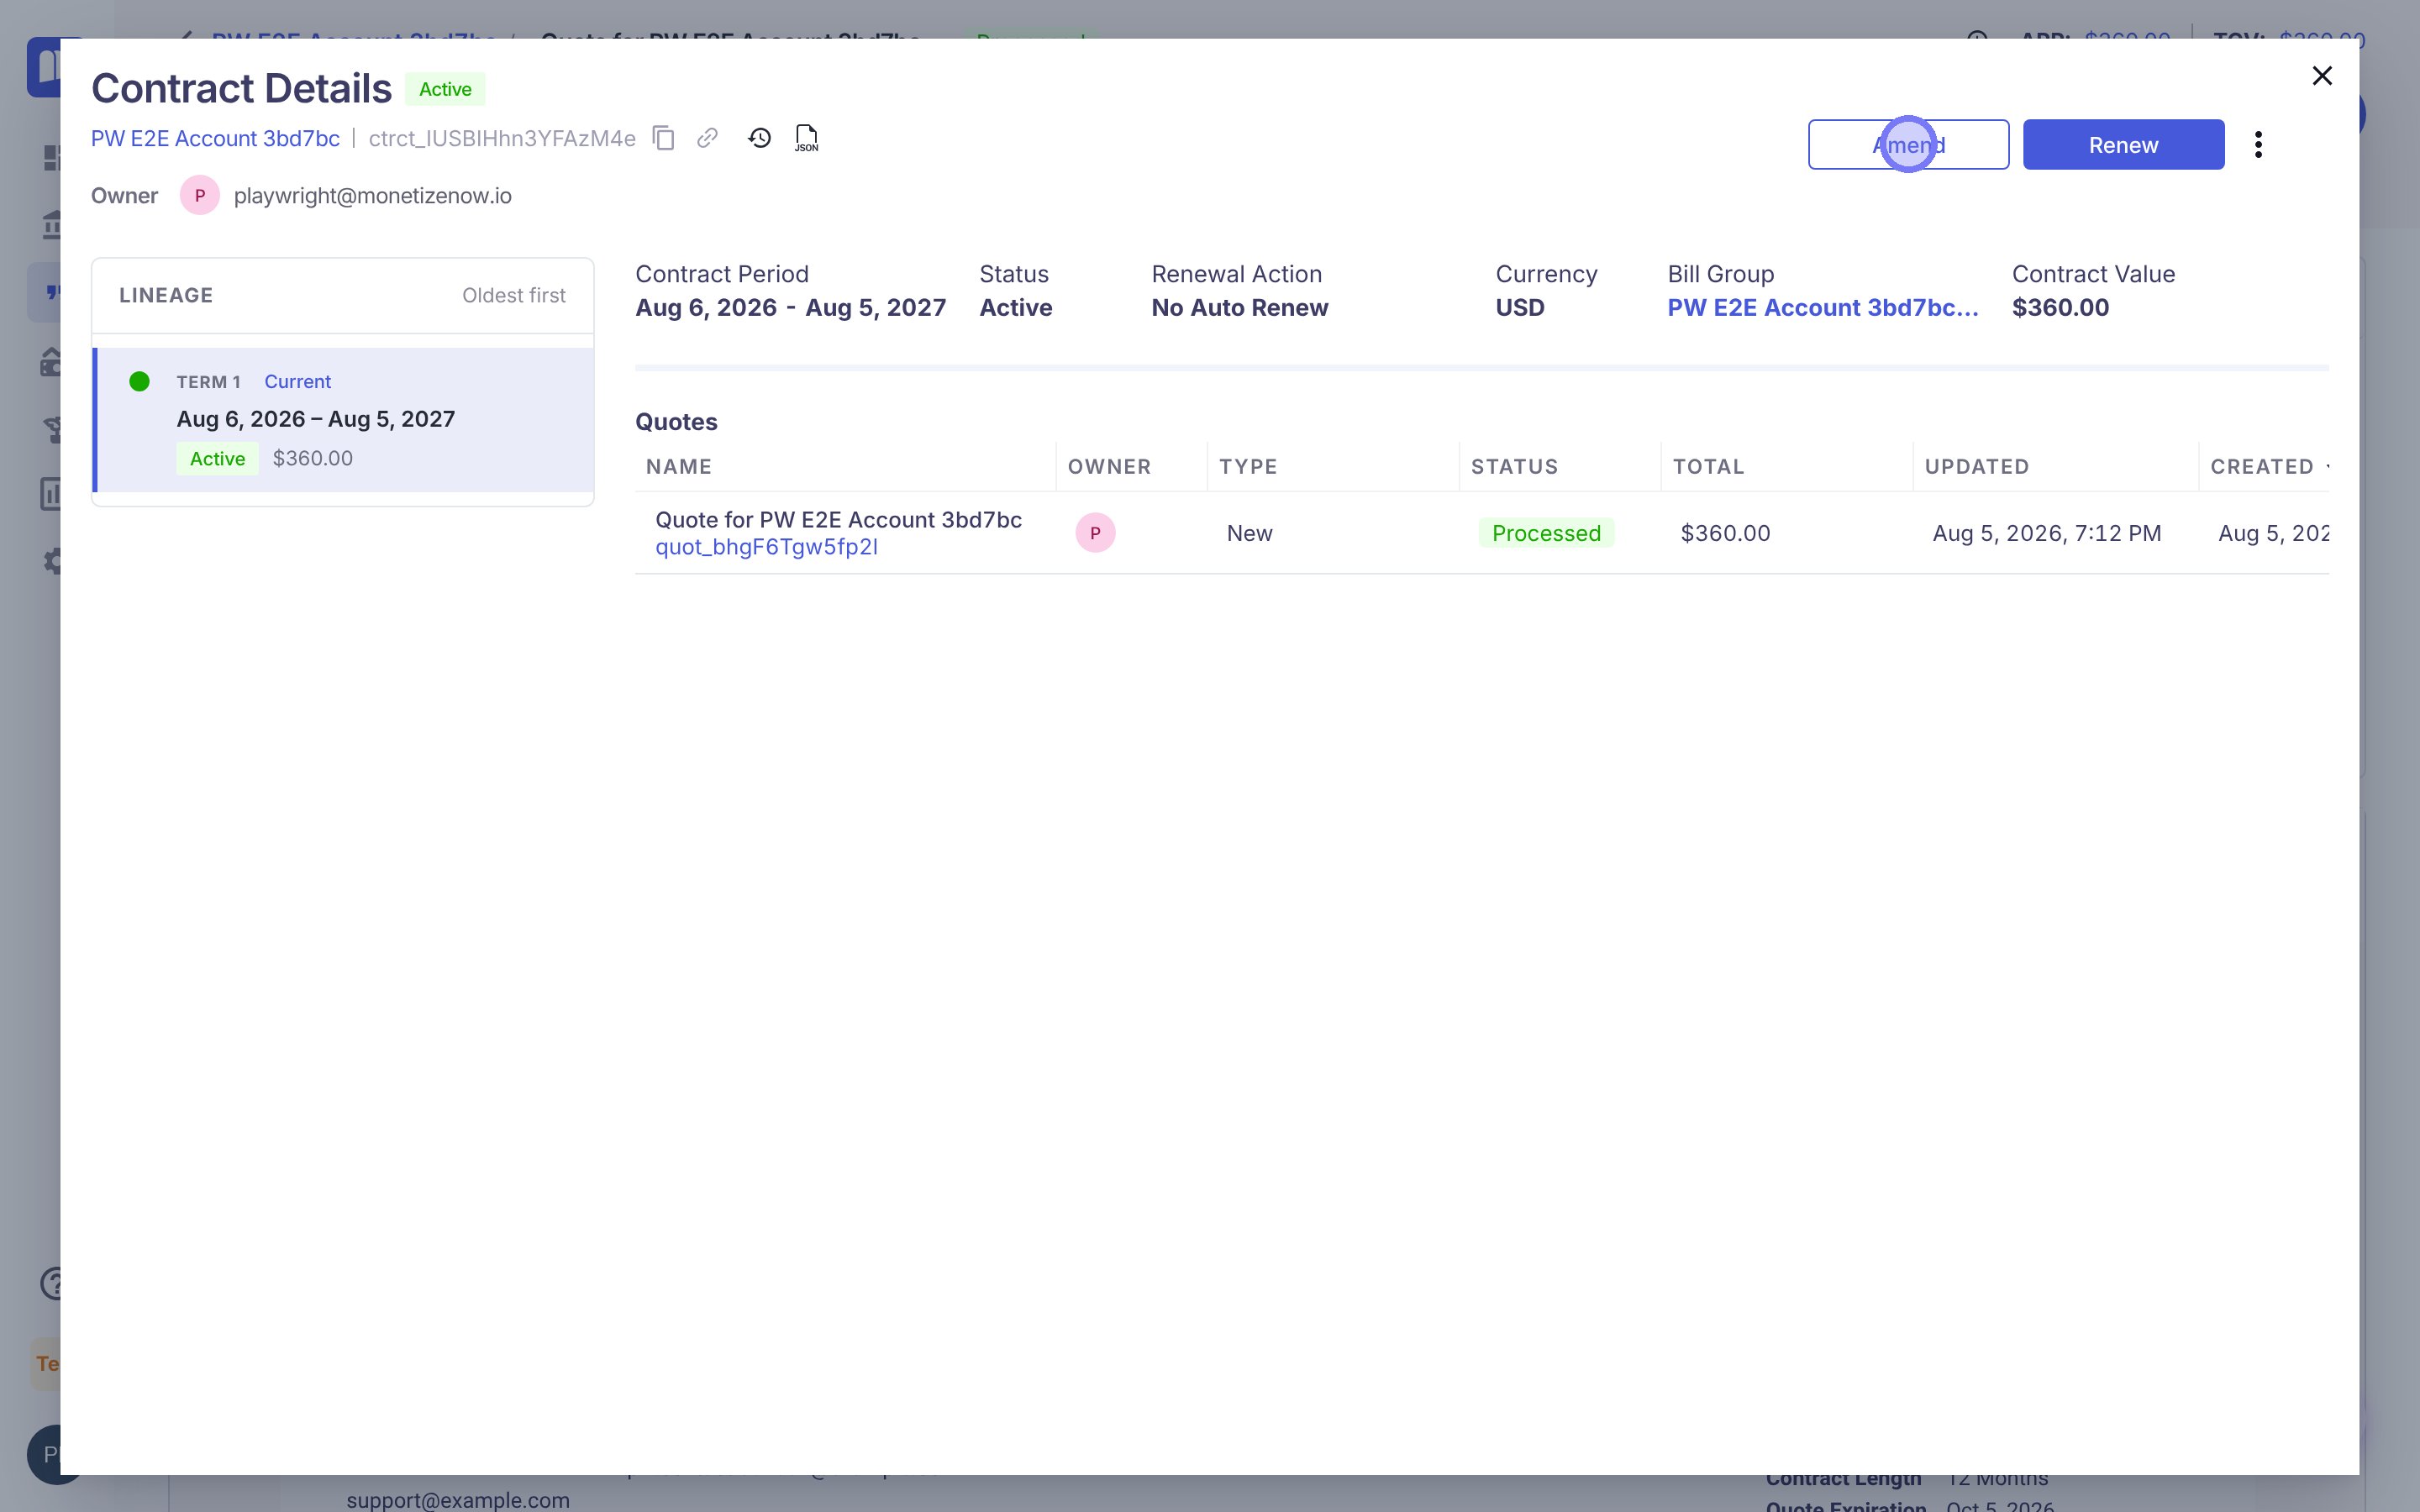
Contract Details: Amend changes the current term and Renew starts the next one
- Renew a contract. Click Renew on the same contract to renew at the end of the term, and test an early renewal if you offer one.
- End to end. Run one deal through every step above without help.
Work with the MonetizeNow team on: testing together, and migrating historical contracts into MonetizeNow (Settings → Tenant → Onboarding → 3. Load Historical Data).
Go live
- Repeat your setup in production. Do the company setup, integrations (connected to your production systems), catalog and rules again in your production tenant.
- Load historical data. Migrate your existing contracts so reps can amend and renew them.
- Run a smoke test. Take one real, low-risk deal through CRM → Quote → approval → signature → invoice.
- Train your team. Run training and demos for reps, deal desk and finance.
- Watch the first billing cycle. Check invoices, tax, payments and the accounting sync after your first live invoice run.
Work with the MonetizeNow team on: go-live support, training and demos, and roadmap input as a member of our Customer Advisory Board.
Reference
Information-oriented. Use it to look things up and to track progress.
Onboarding checklist
1. Set Up Company
- Upload company logo and address (Settings → Tenant → Legal Entities)
- Invite team members (Settings → Tenant → Users & Roles)
- Add MSA and/or terms & conditions (Settings → Quoting → Quote Settings → Quote Documents)
2. Integrate Systems
- Connect eSign (Settings → Integrations → eSign)
- Connect CRM (Settings → Integrations → CRM)
- Connect payments (Settings → Integrations → Payment Gateway)
- Connect accounting system (Settings → Integrations → Accounting)
- Connect tax system (Settings → Integrations → Tax)
3. Configure Catalog
- Design product, pricing and bundling strategy (Off-platform, with your Solutions Lead)
- Load products, offerings and rates (Product Catalog, or Settings → Tenant → Onboarding)
4. Configure Quote Settings
- Approval Rules (Settings → Rules → Approval Rules)
- Validation Rules (Settings → Rules → Validation Rules)
- Conditional Terms (Settings → Rules → Conditional Terms)
- Quote Blueprints (Settings → Quoting → Quote Blueprints)
- Try Monty on a test Quote (Monty button, bottom-right of any page)
5. Test
- CRM → draft Quote (Sandbox)
- Draft → approve → process Quote (Sandbox)
- Quote → billing (Sandbox)
- Amend a contract (Sandbox)
- Renew a contract (Sandbox)
- Full end-to-end workflow (Sandbox)
6. Go Live
- Repeat setup in production (Production)
- Load historical contracts (Settings → Tenant → Onboarding → Load Historical Data)
- Smoke-test a live deal (Production)
- Train your team
- Review the first billing cycle (Production)
Supported integrations
| Category | Settings page | Providers |
|---|---|---|
| eSign | Settings → Integrations → eSign | DocuSign, Adobe Acrobat Sign |
| CRM | Settings → Integrations → CRM | Salesforce, HubSpot, Attio |
| Payments | Settings → Integrations → Payment Gateway | Stripe |
| Accounting | Settings → Integrations → Accounting | QuickBooks, NetSuite, Xero, Rillet* |
| Tax | Settings → Integrations → Tax | Anrok, Avalara, Taxwire*, Vertex* |
| Messaging | Settings → Integrations → Slack | Slack |
| Webhooks | Settings → Integrations → Webhooks | — |
* Shows only when it's enabled for your account. Ask your MonetizeNow team.
Interactive walkthroughs
| Walkthrough | Covers | Time |
|---|---|---|
| Set Up Your Company in MonetizeNow | Legal entity, users, Quote Documents, first approval rule | ~30 min |
| Set up automatic payment collection | Payments settings, Payment Gateway, payment methods, bill groups | ~5 min |
| Create Your First Quote | Building and submitting a Quote for approval | ~3 min |
| Creating a Quote Blueprint | Saving a Quote as a blueprint and starting a new Quote from it | ~2 min |
Terms used on this page
| Term | Meaning |
|---|---|
| Tenant | Your company's MonetizeNow environment. Sandbox and production are separate tenants. |
| Legal Entity | The company you sell from. Its logo, address and terms appear on Quotes and Invoices. |
| Product | One thing you sell, such as a license, a service or a usage meter. |
| Offering | A bundle of one or more products that reps add to a Quote. |
| Rate | The price list for an offering, by billing frequency and currency. |
| Approval Rule | Sends a Quote to people or teams for approval when its conditions match. |
| Validation Rule | Shows an Error, Warning or Info message on a Quote. An Error blocks submission. |
| Conditional Term | A term added to a Quote automatically when its conditions match. |
| Quote Blueprint | A saved Quote that reps use as the starting point for new Quotes. |
| Monty | The AI assistant in MonetizeNow. It answers questions about your Quotes, billing and customer data. |
Why sandbox first
Your sandbox is a full, separate copy of MonetizeNow. You can connect test CRM, payment and accounting accounts, break things, and try pricing ideas without sending a real Quote or Invoice. Once a workflow passes in the sandbox, you rebuild it in production knowing it works.
Why this order
Each stage depends on the one before it:
- Company first, because your legal entity, users and documents appear on everything that comes after.
- Integrations next, because your CRM supplies the accounts, contacts and opportunities that Quotes start from, and your payment, accounting and tax systems decide what happens after a deal closes.
- Catalog before rules, because approval rules, validation rules and conditional terms usually refer to specific products, offerings and discounts.
- Testing last, because only a complete setup shows whether a deal flows from CRM to cash.
What the MonetizeNow team helps with
You can complete every checklist item yourself. Each stage also has an area where working with your Solutions Lead pays off: complex pricing models, custom field mappings, migrating historical contracts, and testing together before go-live. Raise these early so they don't hold up your launch date.
Updated 12 days ago