Customer Portal
Allow your customers to manage their billing relationship
The Customer Portal is currently in early release. Contact your Customer Success manager to gain access.
The Customer Portal allows your customers to view and manage information related to their subscriptions and billing so that you can streamline your billing relationship with your customers.
Through the portal, customers can:
- View their active subscriptions
- See upcoming billing information
- Download invoices
- View billing details and contacts
- Update or add payment methods
Customers can also update their billing and shipping contacts directly in the portal.
Additional capabilities, such as paying invoices, will be added in future releases.
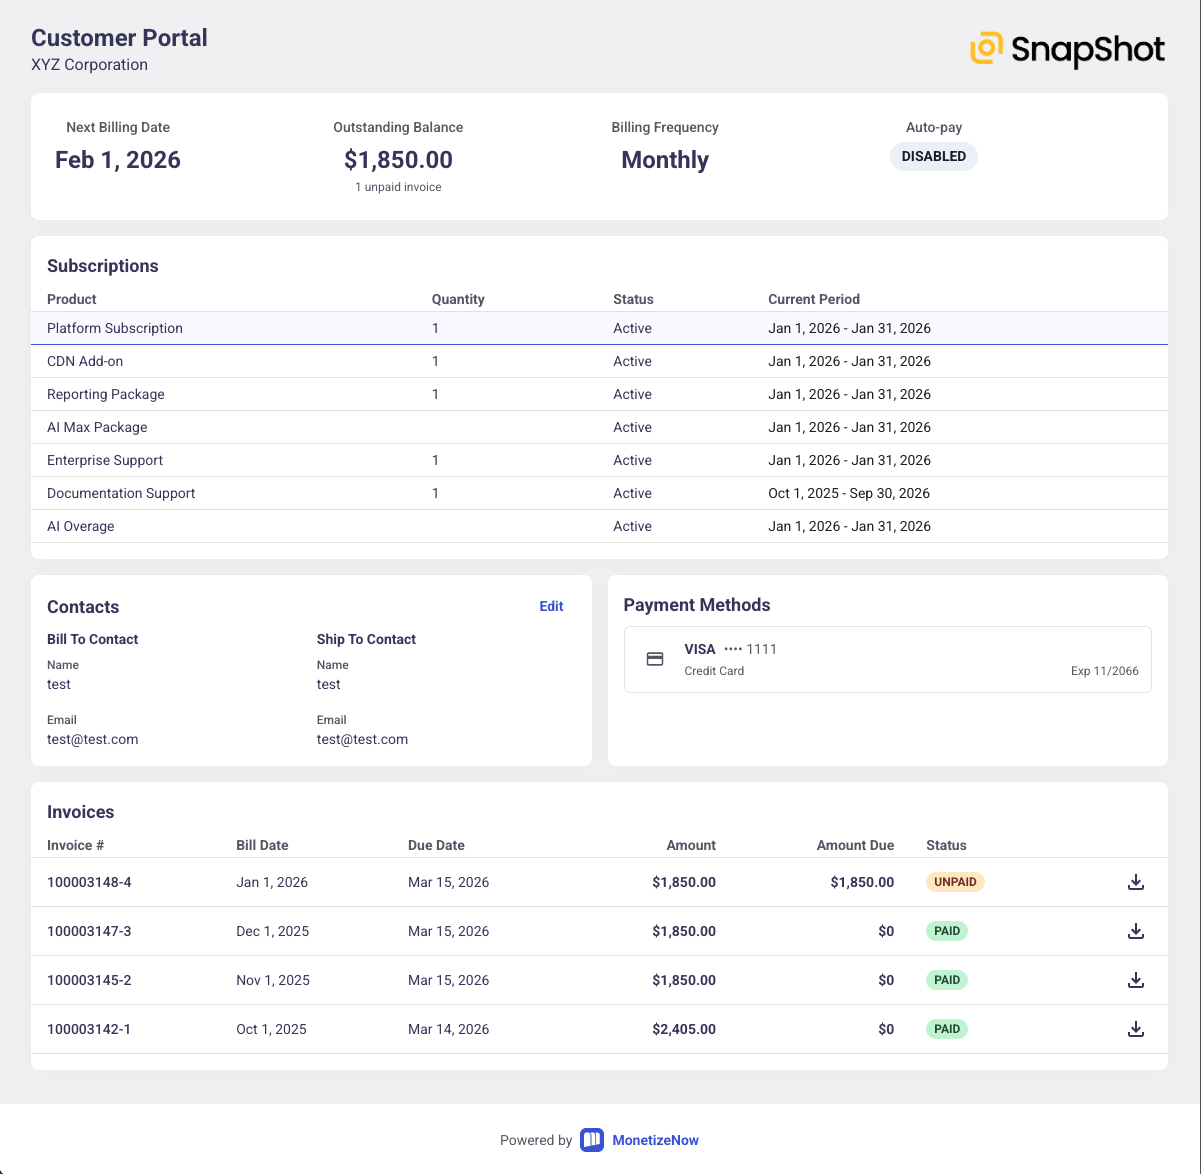
What Customers Can See and Do
Branded Experience
Your entity logo is displayed in the portal to provide a branded experience for your customers.
Billing Summary
Customers can view key billing details, including:
- Next billing date
- Outstanding balance
- Billing frequency
- Auto-pay status
This summary gives customers a quick view of their current billing status.
Customers can add or update their:
- PO Number
- VAT Number
- Registration Number
- Change the default Payment Method
Subscriptions
Customers can view all subscriptions associated with the bill group, including:
- Subscription status
- The products or services they currently own
This makes it easy for customers to understand what they are subscribed to.
Billing and Shipping Contacts
Customers can view and update their:
- Billing contact
- Shipping contact
This allows customers to keep their contact information up to date without needing assistance.
Payment Methods
Customers can view the payment methods associated with their account.
Currently:
- Payment methods can be viewed
- Customers can add a new payment method or change their default payment method
Invoices
Customers can view all invoices associated with their account.
For each invoice they can:
- See the invoice status
- Download the invoice
Portal Access and Scope
The Customer Portal is scoped to a Bill Group.
- Each Bill Group has its own portal access settings
- If a customer has multiple Bill Groups, access must be configured separately for each one
How to Set Up Customer Portal Access
Step 1: Open the Bill Group
This billing portal is available for any customers that have an active contract.
- Navigate to the Account Overview or a specific Bill Group.
- Click on the "Customer Portal" button
- Choose which email domains or individual email addresses have access to the portal for this account
- Click "Copy Portal Link"
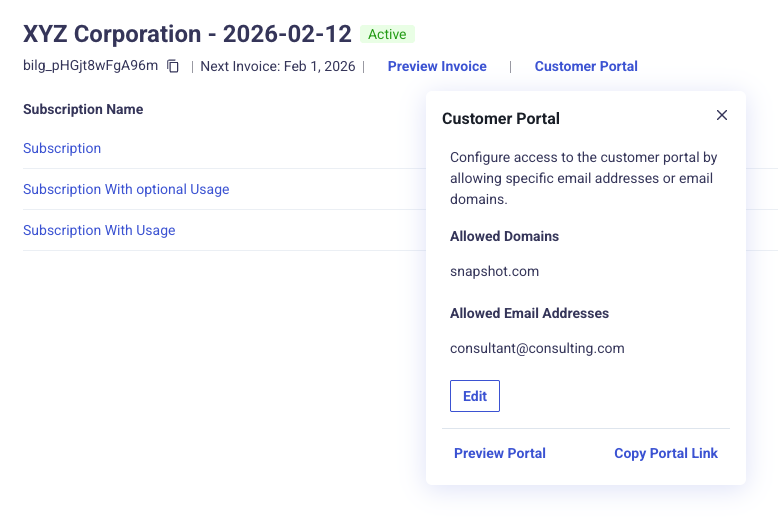
Step 2: Grant Access
You can grant access in two ways:
- Domain Access
- Allow all users from a specific domain to access the portal.
- Example: company.com
- Any user with an email from that domain can sign in.
- Individual Email Access
- Grant access to specific email addresses.
- Enter the email address
- Click Add to include additional users
- Note: Email addresses must be added individually and cannot be comma-separated.
- Grant access to specific email addresses.
The system prevents overlapping access rules. For example, you cannot add an email address if its domain is already granted access.
Step 3: Share the Portal Link
Once access is configured:
- Copy the Customer Portal link
- Share it with your customer
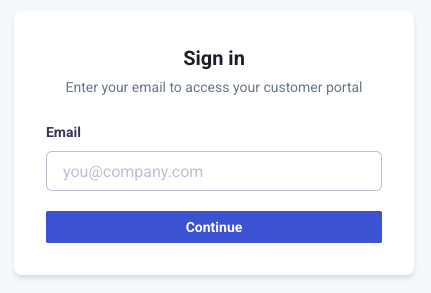
How Customers Sign In
When a customer opens the portal link:
- They enter their email address
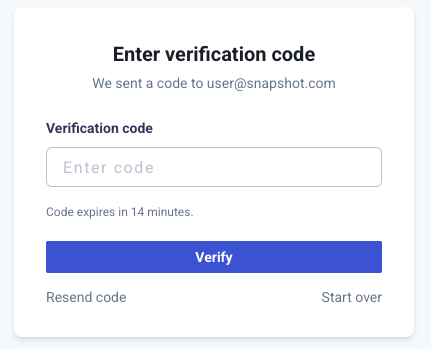
- They receive a verification email
- They click the verification link to sign in
No password is required.
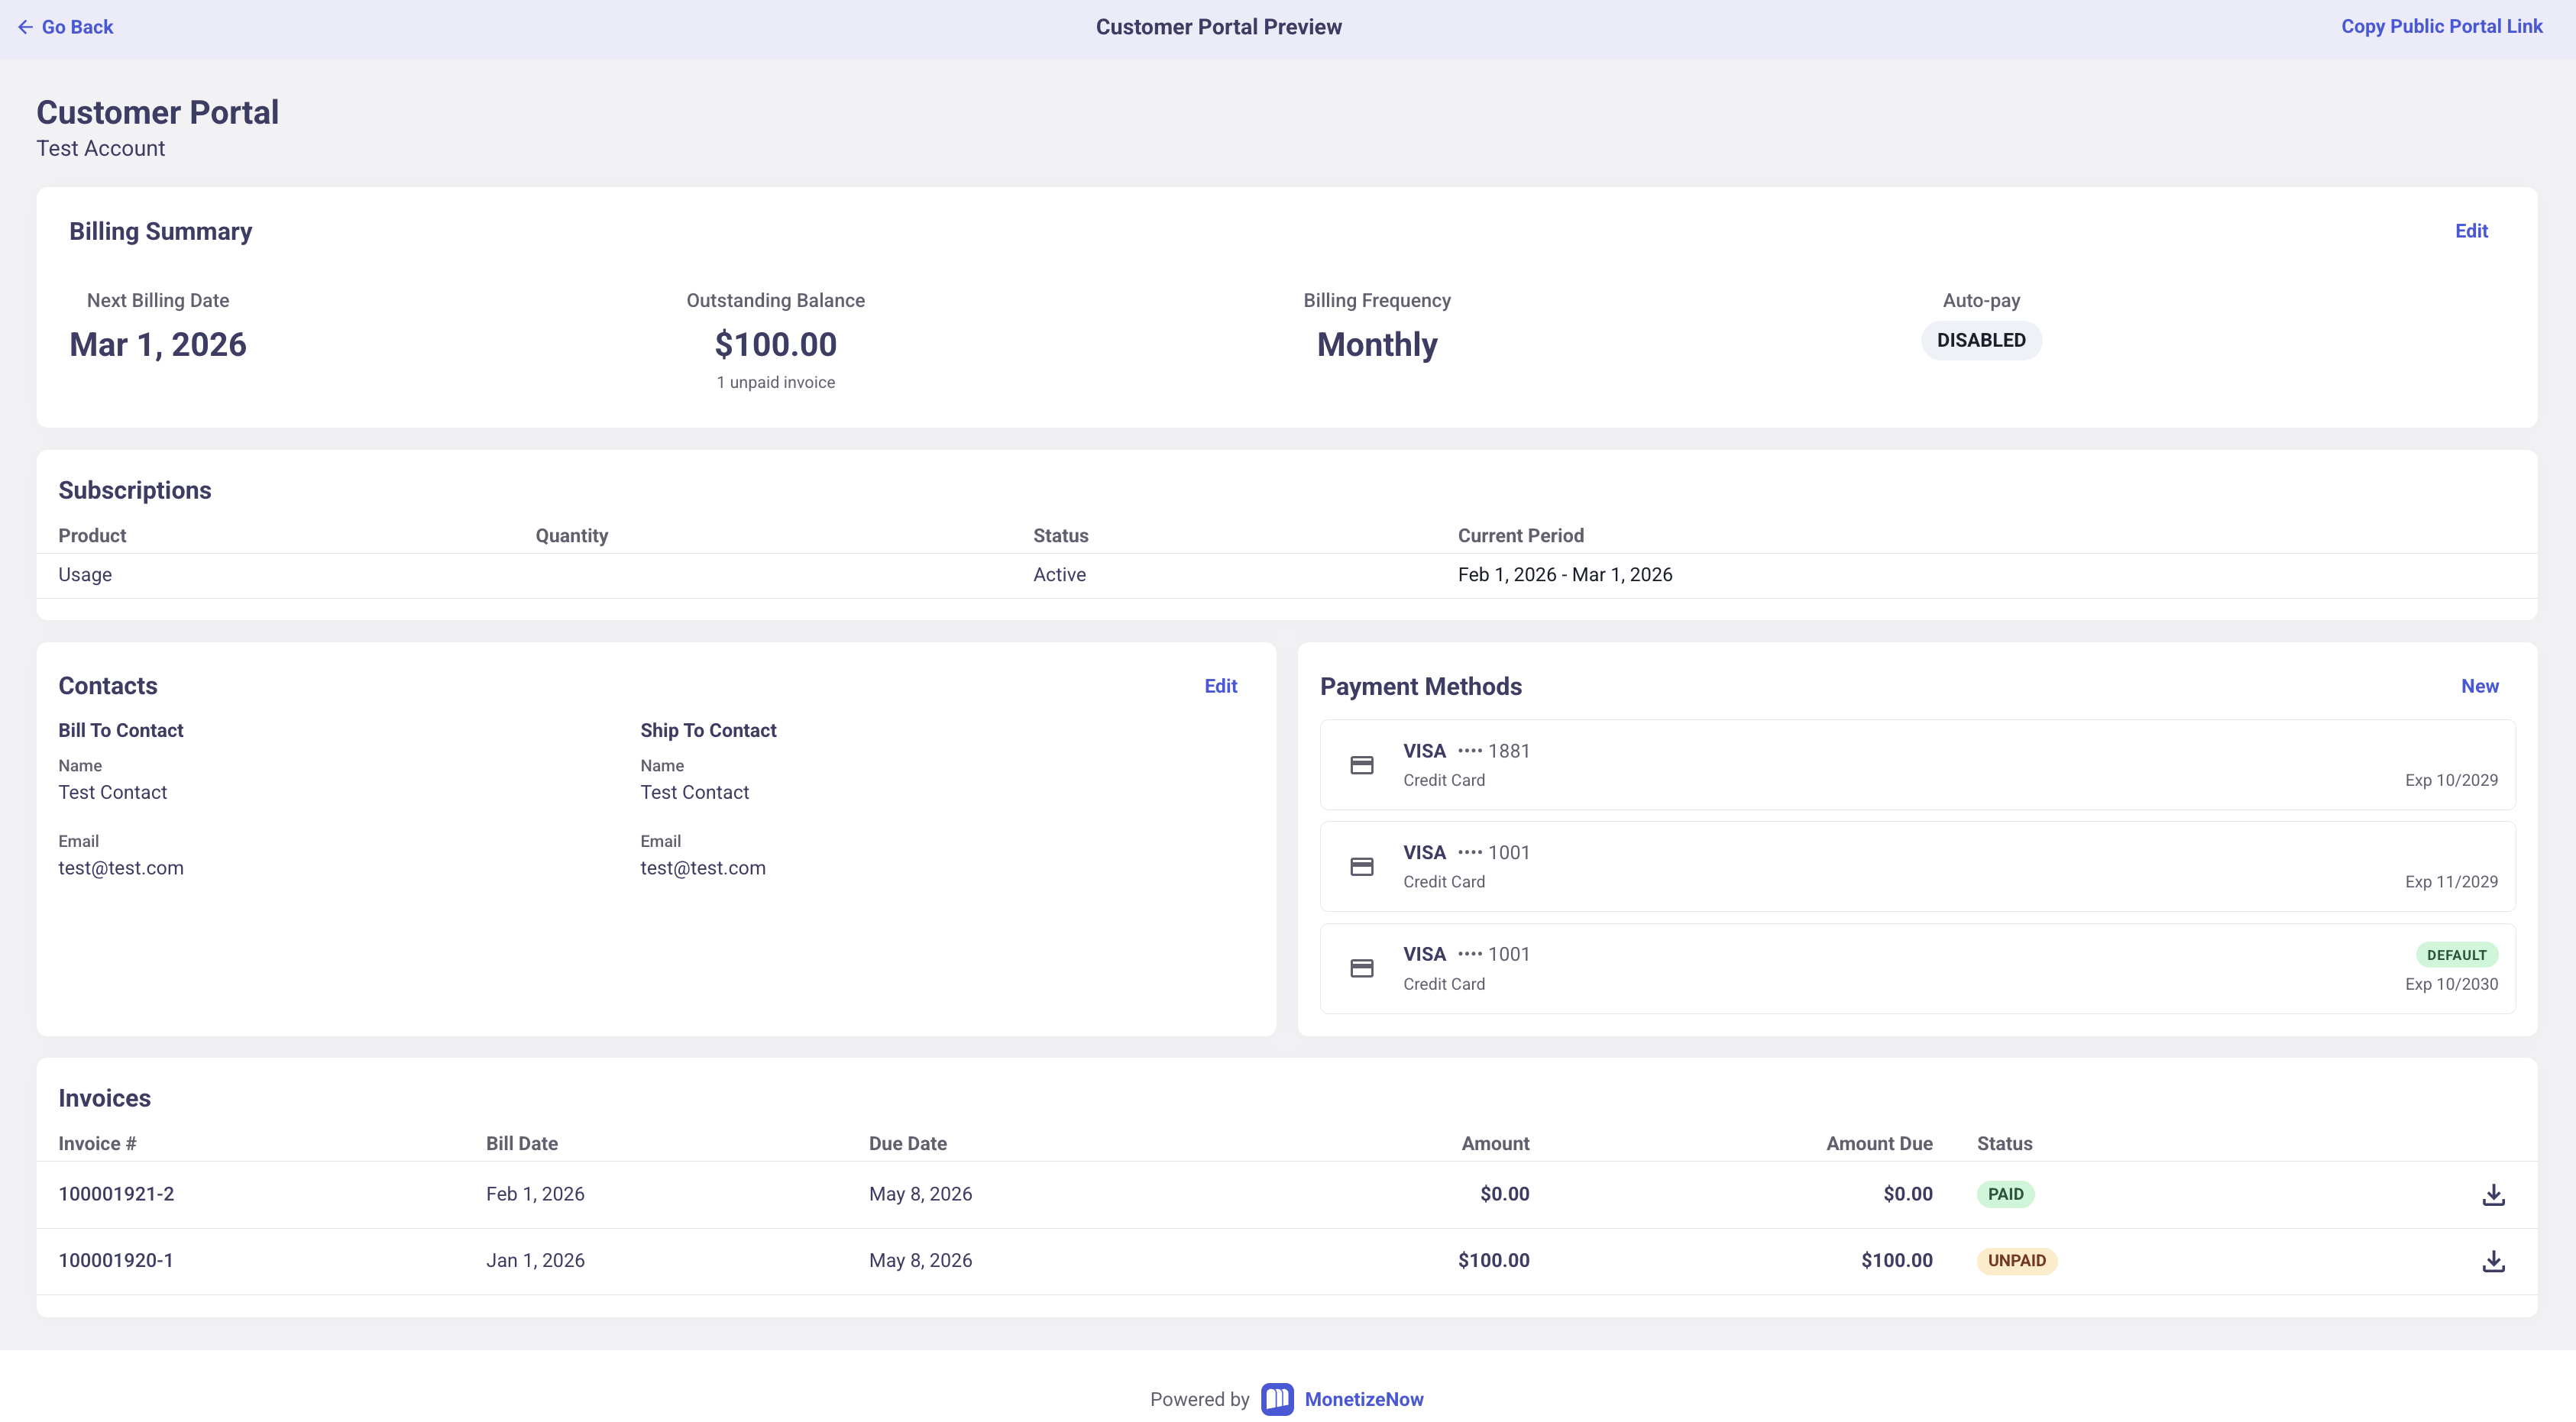
Previewing What Your Customer Will See
You can use the Preview Portal button (from the Bill Group) to see the portal exactly as your customer will experience it, prior to sharing the link with your customer.
Updated 3 months ago